
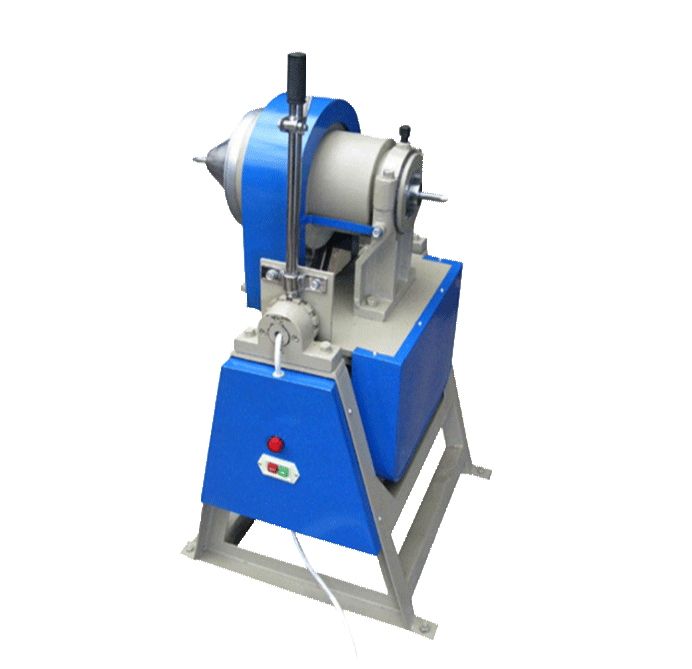
Laboratory Rod Grinder: How Fine Grinding Works and Where It Fits in the Lab

If you have ever tried to grind a sample to a tight size range, you know the feeling: the powder looks fine, but the histogram tells a different story. You get a tail of coarse particles, a heap of ultrafine dust, or both. A laboratory rod grinder is one of the tools that can help you get out of that corner. Instead of a drum full of balls, it uses a charge of long rods that tumble inside a rotating chamber. The result is a gentler, more line-based grinding action that can be easier to control in small batches. In this guide, we will walk through what the machine does, why the rods matter, where it fits in a lab workflow, and what to check before you buy or run one. No hand-waving, no catalog talk. Just the practical stuff.
What a Laboratory Rod Grinder Actually Does
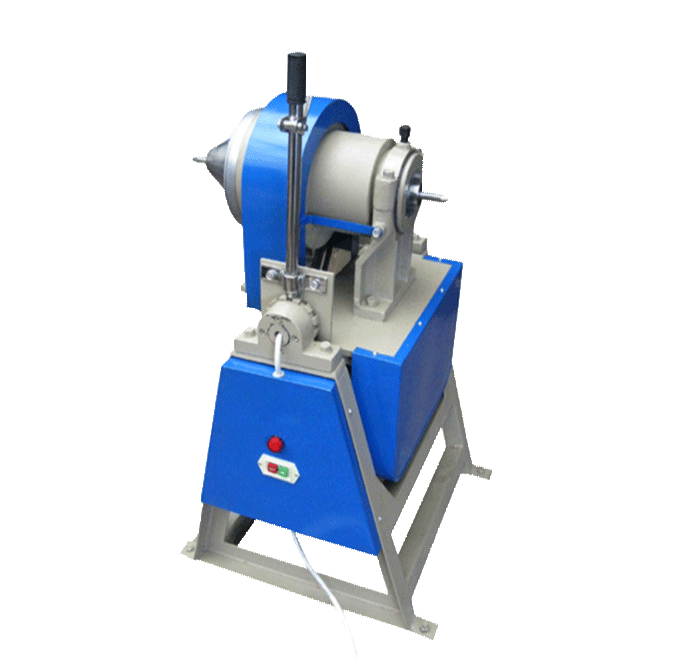
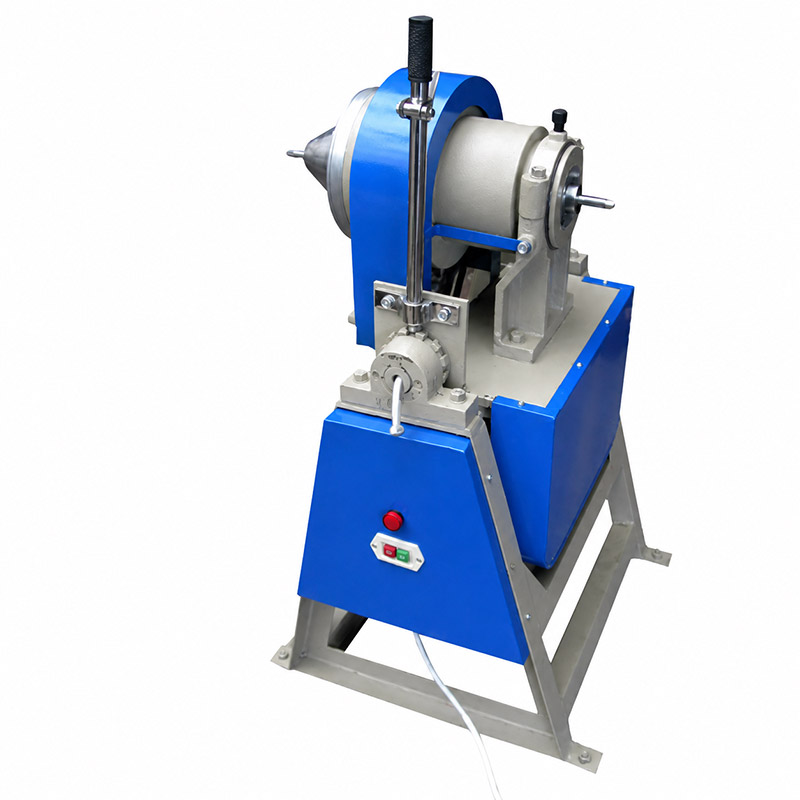
Picture a horizontal cylinder with a door, a drive, and a set of long metal rods inside. You load the sample, close the chamber, and let the cylinder turn. As it rotates, the rods lift and tumble. They do not just fall on the sample like a hammer. They roll, slide, and rub against each other and against the chamber wall, and that motion breaks the particles trapped between them. The word rod is the key. The grinding media are long pieces that span much of the chamber length, so the action is distributed along a line rather than concentrated at a point.
The word laboratory matters too. A lab-scale rod grinder is not a shrunken copy of a huge plant mill. It is built around small batches, easy cleaning, and repeatable settings, so you can test an idea without committing to a production run. You might use it to prepare a sample for analysis, to check how a material responds to rod milling, or to produce a small lot of powder for a customer trial. The machine is compact enough for a bench or a small floor area, and the operating logic is simple: load, set, run, discharge, clean. That simplicity is exactly why it belongs in a lab.
Why Rods Instead of Balls? The Mechanics in Plain Language
Balls are the default grinding media in many labs, so it is fair to ask why anyone would use rods. The answer comes down to how the media meet the powder.
Line contact, not point contact
A ball touches the sample at a point. A rod touches it along a line. That difference sounds small, but it changes the breakage pattern. With line contact, the force is spread over a longer region, so the mill tends to break particles more evenly instead of hammering a few spots. In practice, that can mean fewer fines and a tighter distribution. It can also mean less overgrinding, which is a fancy way of saying you are less likely to turn half your sample into dust while waiting for the coarse end to catch up. The effect depends on the material, the rod charge, and how you run the mill, but the principle is worth remembering.
The rod charge and the tumbling action
The set of rods inside the chamber is called the rod charge. When the mill turns, the charge climbs up one side and then cascades back down. The rods can also spin and slide against each other. That combination gives you impact, attrition, and friction in one process. The rods must be long enough to do useful work along the chamber, but they also need room to move. If the charge is too sparse, you lose grinding efficiency. If it is too dense, the rods cannot tumble properly and the mill can labor. Getting that balance right is part of learning to run the machine well.
What this means for your sample
For a lab, the practical benefit is control. Rod milling is often a good fit when you want a relatively narrow particle size range, when you are worried about creating too many fines, or when you need to study how a material behaves under a more shear-heavy grinding action. It is not a magic wand. A rod grinder will not fix a sample that is too wet, too sticky, or too coarse for the chamber. It will not replace a jaw crusher for big lumps. But when the feed is already manageable and the goal is fine grinding with a bit more finesse, rods can be the better choice.
Where a Laboratory Rod Grinder Fits in the Lab
It helps to think of the rod grinder as a middle step, not a do-everything machine. It sits between coarse preparation and final analysis, or between a raw material and a small trial batch. Here are the places where it earns its bench space.
Preparing samples for analysis
Many analytical methods need a powder that is representative and fine enough to digest, fuse, or press into a pellet. A rod grinder can take a pre-crushed sample and bring it down to a workable size while keeping the batch small. Because the chamber is easy to empty and clean, you can move from one sample to the next without carrying over contamination. That matters when you are running a sequence of geological, ceramic, or chemical samples and every result needs to stand on its own.
Testing a flowsheet before scale-up
Before a plant commits to a milling circuit, someone has to answer a simple question: how does this ore or powder behave when we grind it? A lab rod grinder lets you run that test with a small amount of material. You can change the run time, the rod charge, and the feed size, then compare the products. The results will not scale perfectly to a production mill, but they give you a useful picture of grindability, overgrinding risk, and the kind of size distribution you can expect. That is far better than guessing from a data sheet.
Making narrow cuts without overgrinding
Some products are judged not just by how fine they are, but by how narrow the size range is. Toners, technical ceramics, and certain pigment or battery materials come to mind. A rod mill can be attractive in those cases because the line-contact action tends to produce a more uniform grind than a ball charge. Again, the material has the final say. But if your current process gives you a broad spread and too many fines, rod milling is a sensible experiment to run.
When a rod grinder is not the right tool
Be honest about the limits. If your feed is still in big chunks, you need a crusher or a coarse mill first. If the sample is soft and sticky, the rods may smear the material instead of breaking it. If you need a very high surface area in a hurry, a high-energy ball mill may be more direct. And if you are processing a handful of grams, a smaller benchtop option may be more practical. A rod grinder is a specialist, not a universal soldier. The trick is to know what job you are giving it.
What to Look at Before You Choose a Unit
Once you know you want rod milling, the next step is choosing a unit that fits your lab. The details matter more than the brochure photos. Here is what we would check.
Chamber, rods, and sample contact
Ask how the chamber is constructed, how the rods are loaded, and how the sample contacts the surfaces. You want a chamber that can be cleaned thoroughly and a rod set that suits the size of your batch. The fit between the rods and the chamber matters because it affects the tumbling action. Too much play and the grind becomes inefficient. Too little and the rods may jam or wear unevenly. Since the rods are the working part of the mill, easy access to them is not a luxury. It is part of everyday operation.
Drive, control, and repeatability
A lab mill is only useful if you can run it the same way twice. Look for a drive that starts smoothly and a control system that lets you set and repeat the run. You do not need a spaceship cockpit. You need clear controls, a stable speed, and a timer you can trust. If you plan to compare tests, write down the settings every time. The machine is one half of the experiment. Your record-keeping is the other half.
Discharge and sample recovery
Getting the powder out should not be a battle. Check how the chamber opens, where the product exits, and whether you can recover the full batch without scraping for ten minutes. A good lab grinder respects the value of your sample. It should also be easy to inspect after a run, so you can see whether material has packed into corners or coated the rods. If discharge is awkward, you will use the mill less often, and that defeats the purpose of having it.
Safety, dust, and cleaning
Fine powders can be dusty, and dust is both a health issue and a contamination issue. Look for a design that contains the sample during operation and makes cleanup straightforward. Think about how you will open the chamber, where you will place the mill, and how you will handle powders that are hazardous or sensitive to air. A lab is not a production floor, but the same basic rules apply: control the dust, protect the operator, and keep the workspace clean. The best mill is the one you are comfortable using every day.
If you want to see how these points come together in a real product, start with the laboratory rod grinder product page and check the current configuration and accessories. That is the right place to confirm details rather than relying on a general article.
Running a Laboratory Rod Grinder Without Guesswork
You do not need a PhD in comminution to run a rod mill well, but you do need to pay attention. A few habits will save you time and samples.
Start small and keep notes
Run a small batch first. Use a feed size the chamber can handle, set a moderate run time, and see what comes out. Then adjust one thing at a time. If you change the speed, the time, and the rod charge all at once, you will not know which change did the work. Keep a simple log: sample name, feed mass, rod set, run time, speed setting, and product description. A photo of the product next to a scale is worth more than a vague memory. This is how a lab builds its own know-how.
Load the mill with intention
Do not fill the chamber just because it is there. The rod charge and the sample volume both need room to move. If the mill sounds like it is working hard, it may be overloaded. If the rods barely move, the charge may be too low. Start with the manufacturer's guidance, then adjust based on what you see and hear. Remember that the sample is part of the load. A large sample can cushion the rods and reduce the grinding action, so the same settings may behave differently from one batch to the next.
Listen to the mill
Your ears are a useful instrument. A healthy rod mill has a steady, rhythmic sound as the charge tumbles. A dull thud, a sudden rattle, or a high-pitched squeal can mean something is wrong. It might be an overload, a loose part, or a rod that is not moving as it should. Stop and check before you continue. This is not about being overly cautious. It is about protecting the machine and the sample. A few seconds of listening can prevent a damaged rod set or a batch that has to be thrown away.
Clean between samples
Cross-contamination is quiet. A few grams of the previous sample can change the result of the next one, especially when you are working with trace elements or sensitive formulations. Empty the chamber, brush the rods, and check the corners. If the material is sticky, do not just run the next batch and hope for the best. Clean until you would be happy to use the mill for your own sample. That standard sounds simple, but it is the one that keeps a lab honest.
Matching the Mill to Your Material
Every material has its own personality. The same rod grinder that works beautifully on one powder can struggle with another. Here is how to think about the match.
Hard, brittle, and abrasive samples
Hard, brittle materials are the classic rod mill feed. They break by fracture, and the line-contact action can produce a relatively even grind. The catch is wear. Abrasive samples will wear the rods and the chamber over time, so you need to check the media and replace them when they are no longer doing their job. Wear is not just a maintenance cost. It can also contaminate the sample, so choose a rod material that is compatible with your analysis. If you are grinding a hard ceramic or mineral, ask about wear parts before you buy.
Heat-sensitive and reactive samples
Grinding generates heat. In a rod mill, the tumbling action and the friction between rods and sample can warm the batch, especially during a long run. If your material is heat-sensitive, run shorter cycles and give the mill time to cool. If it reacts with air or moisture, you need a setup that protects the sample. Do not assume that a lab mill is automatically inert. Think about the atmosphere, the temperature, and the time the powder spends in the chamber.
Sticky or soft samples
Soft and sticky materials are the difficult guests at the grinding party. They can coat the rods, pack into corners, and turn the chamber into a mess. In some cases, a rod mill will still work if you keep the batch small and the run short. In others, a different grinding method is simply a better fit. If you are not sure, run a tiny trial before you commit a full batch. That is cheaper than cleaning a chamber full of paste.
The target particle size question
Start with the end in mind. What size range do you actually need, and how will you measure it? A rod grinder can produce fine powders, but it is not a single-button answer to every size target. The feed size, the run time, the rod charge, and the material all interact. If you need a narrow cut, plan to test and measure. If you only need a rough grind, you may not need to chase the last few microns. Matching the method to the measurement is part of good lab practice.
A Simple Selection Checklist
Before you request a quote or book a trial, run through these questions. They will keep the conversation focused and help you avoid a machine that looks good on paper but does not fit your work.
- What is the feed size, and has the sample already been crushed?
- What particle size range do you need, and how will you measure it?
- Is the material hard, brittle, soft, sticky, abrasive, or heat-sensitive?
- How much sample do you need per batch, and how often will you run it?
- Will you use the mill for one material or a rotating mix of samples?
- How important is easy cleaning and sample recovery?
- Do you need to compare runs, record settings, or share data with a team?
Why TENCAN and the Laboratory Rod Grinder Deserve a Look
If you are shopping for a lab-scale rod mill, the TENCAN laboratory rod grinder is a practical place to start. The product page is the best source for current specifications, options, and accessories, so use it to confirm the details that matter to your application. If you need to compare rod milling with other grinding methods, the same site can help you see the wider range of options. The right machine is the one that fits your sample, your workflow, and your budget, not the one with the longest feature list.
Questions People Ask Before Trying Rod Milling
A few questions come up again and again. Here are direct answers, without the sales gloss.
Is a rod mill better than a ball mill?
Not automatically. A rod mill is often better when you want a narrow size distribution and less overgrinding. A ball mill is often better when you need high energy, a very fine product, or a more general-purpose grinding tool. The right answer depends on the material and the target. If you can, test both. A small trial will tell you more than a long argument.
Can I use a laboratory rod grinder for every sample?
No. It is a specialist tool. It likes feed that is already manageable in size and materials that break rather than smear. Sticky, soft, or very coarse samples may need a different approach. That is not a weakness. It is just the nature of the method. Use the rod grinder where rods make sense, and use other equipment where they do not.
How do I know the mill is working properly?
Watch the product, listen to the sound, and check the power or load indicators if the mill has them. A steady rhythm and a consistent product are good signs. A sudden change in sound, a hot chamber, or a batch that looks uneven are signs to stop and investigate. Keep notes so you can compare one run with the next. Over time, you will learn what normal looks like for your material.
Bring It Back to Your Bench
The laboratory rod grinder is not a glamorous machine, and that is part of its charm. It does one job with a simple mechanism: long rods tumble, powder gets caught between them, and the result is a grind you can control. If you need a narrow size range, a small batch, and a process you can clean and repeat, it is worth a serious look. Start with a small trial, keep your notes honest, and match the machine to the material. That is how good lab work happens. And if you are ready to see the hardware, the product page is waiting.
Related Products
Get In Touch
Our professional team will reply to you within one business day. Please feel free to contact us!