
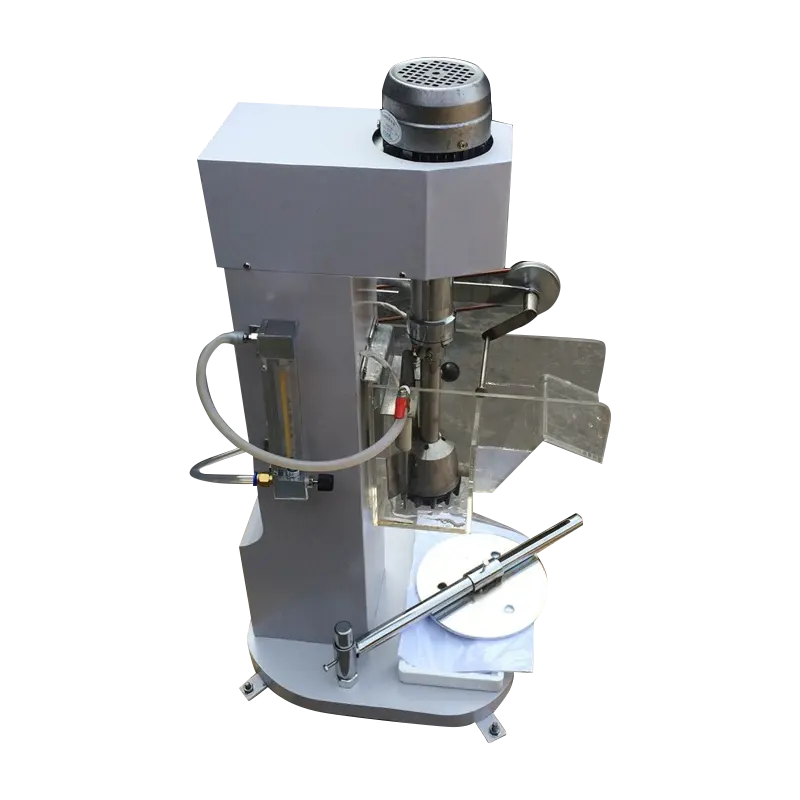
Experimental Flotation Machine: Practical Guide to Laboratory Flotation Testing

Flotation looks easy until you try to make it repeatable. You mix ore with water, add reagents, bubble air through the pulp, and collect the froth. In the lab, every one of those steps becomes a decision: how fine to grind, which collector to try, how long to condition, how hard to agitate, and how much froth to pull. An experimental flotation machine gives you a controlled place to make those decisions before anyone commits to a pilot plant or a full-scale circuit.
What an Experimental Flotation Machine Actually Does
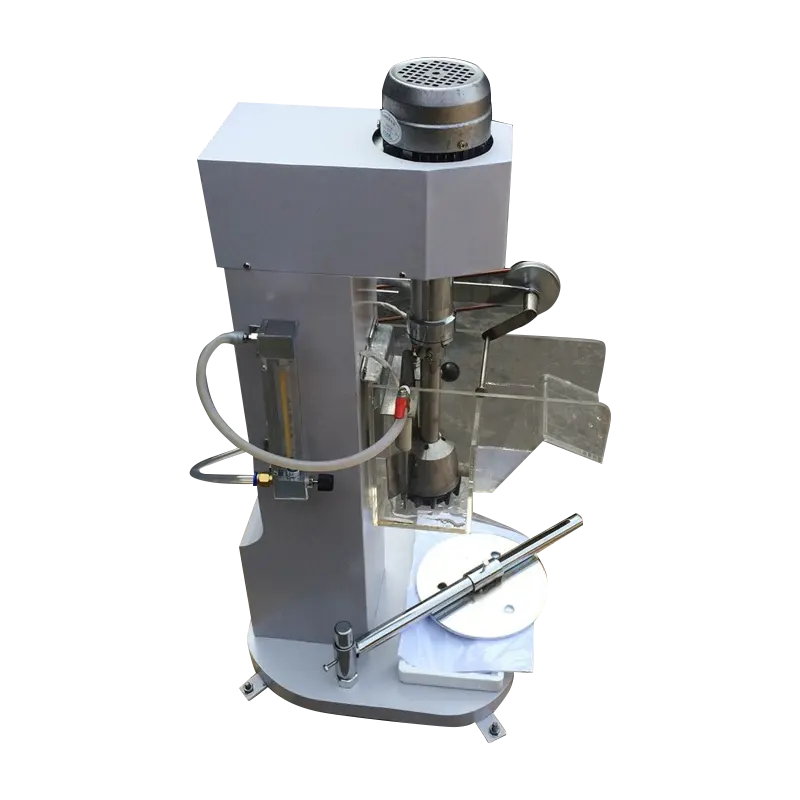
At bench scale, the machine is not a tiny copy of a plant cell. It is a batch tool. You load a sample, set the conditions, run the test, and collect one or more concentrates over time. The best units do four jobs well: keep solids suspended, disperse air into small bubbles, let a froth layer form, and let you remove that froth in a consistent way.
That consistency matters more than brute force. If the impeller speed drifts, the air rate changes, or the froth is scraped differently from one test to the next, you are no longer comparing reagents or grind sizes. You are comparing noise. A good experimental flotation machine gives you repeatable control over the variables that affect flotation, so the result reflects the ore and the recipe rather than the operator’s mood.
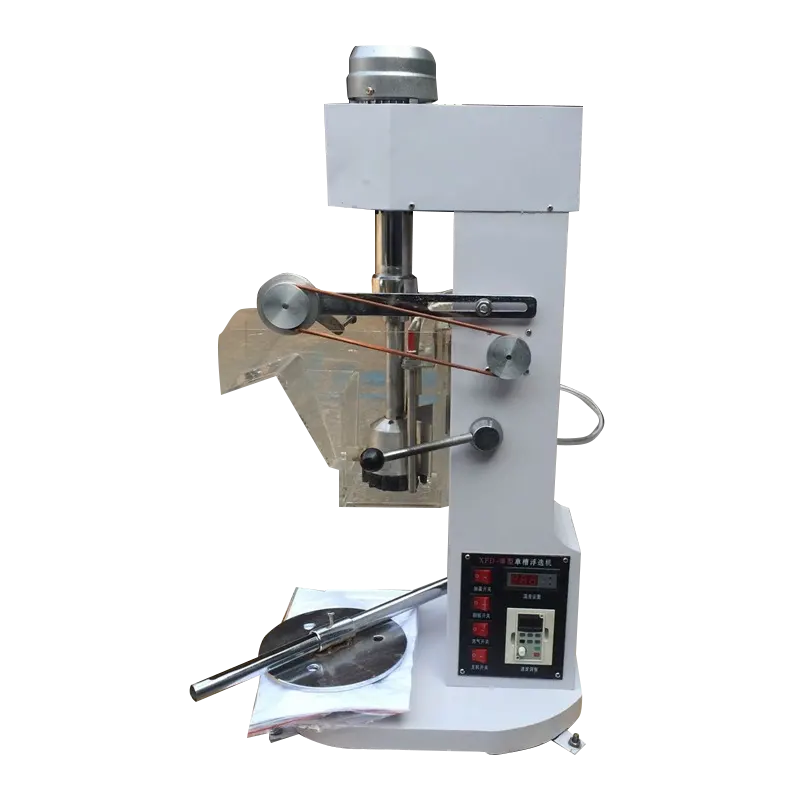
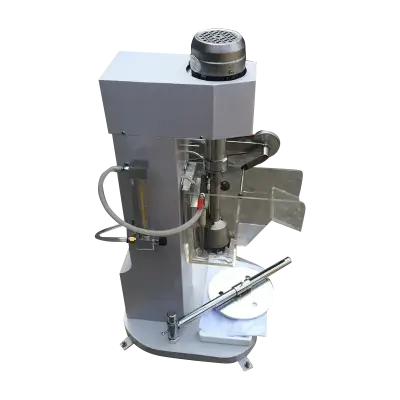
If you are setting up a lab program, TENCAN’s experimental flotation machine is designed for this kind of bench-scale testwork. You can see the unit and its configuration here: experimental flotation machine. The useful question is not simply “how big is the cell?” It is “can I control the test well enough to trust the next result?”
The Core Science in Plain Language
Flotation separates particles by how they behave at a water-air interface. Some particles prefer water. Some prefer air. We call the air-preferring ones hydrophobic, which simply means water-repelling, and the water-preferring ones hydrophilic, or water-loving. Bubbles rise through the pulp, hydrophobic particles attach, and the froth carries them out.
Particles, water, air, and chemistry
A collector reagent adsorbs onto the target mineral and makes its surface more hydrophobic. A frother helps create small, stable bubbles. Activators and depressants switch flotation on or off for certain minerals, while pH modifiers change the chemistry of the pulp. None of this happens in a vacuum; the reagent recipe, the water, and the mineral surface all interact.
Liberation is the other half of the story. If the valuable mineral is still locked inside a gangue particle, no reagent will make that particle float cleanly. Grind too coarse and you leave locked particles behind. Grind too fine and you create slimes that coat bubbles, trap water, and make the froth dirty. A lab flotation test helps you find the practical middle ground.
Why the froth is not just foam
The froth is a transport layer, not decoration. It needs to be stable enough to carry useful minerals out of the cell, but not so stable that it holds everything else with it. Froth depth, bubble size, and the way you remove the froth all influence grade. A deep froth can drain more entrained gangue back into the pulp; a shallow froth may improve recovery but pull more unwanted fines.
Entrainment is the mechanical carrying of fine particles into the froth with the water. It is different from true flotation, where a particle attaches to a bubble. This is why two tests can show the same recovery but very different concentrate grades. One may be floating the target mineral; the other may simply be scooping up everything small enough to ride the froth.
The three dials you are really adjusting
Most lab work comes back to three dials. Chemistry covers reagent type, dose, pH, and water quality. Hydrodynamics covers agitation, air rate, bubble size, froth depth, and froth removal. Mineralogy covers liberation, particle size, surface oxidation, and gangue composition. When a test surprises you, one of those three dials usually explains it.
What a Lab Flotation Test Can Tell You
Grade, recovery, and the trade-off
Recovery tells you how much of the target mineral reports to the concentrate. Grade tells you how concentrated it is. Mass pull tells you how much of the feed you actually removed as concentrate. Those three numbers belong together. A test that gives high recovery with a very low grade may be pushing too much gangue into the froth; a test with a beautiful grade may be leaving valuable mineral behind.
Useful flotation work maps the trade-off rather than chasing one number. You want a grade-recovery curve, not a single heroic result. The shape of that curve tells you whether a change is genuinely improving selectivity or simply shifting the balance between recovery and cleanliness.
Flotation kinetics and residence time
Minerals do not all float at the same speed. Fast-floating particles report to the froth early; slow-floating particles need more time, more reagent, or better liberation. Collecting timed concentrates lets you see that difference. It also gives you a more realistic picture of what a continuous circuit would need, because plant cells do not hold slurry forever.
Reagent screening and dose response
A lab machine is excellent for reagent screening, provided you change one thing at a time. Start with a baseline, vary the collector dose, then the frother, then pH, and keep the rest of the conditions fixed. A dose that looks good in one test may be outside the practical range once you consider cost, downstream effects, and reagent consumption. The lab should narrow the field, not anoint a winner after one run.
Variability and risk
One sample is a story. Several samples are evidence. Test different ore types, alteration zones, or depth intervals if your deposit is variable. Repeat at least part of the program. The goal is not to prove that flotation works; it is to understand how sensitive the result is to things you cannot control in the plant, such as feed mineralogy, water chemistry, and grind size.
What the lab cannot decide for you
Lab flotation can compare options, but it cannot remove the need for engineering judgment. It will not tell you the final reagent cost, the maintenance burden of a thickener, or how the circuit will behave when the feed changes at 3 a.m. Treat the machine as a decision-support tool. It gives you evidence about floatability and selectivity; the rest of the flowsheet still needs its own checks.
Before You Run: Sample and Test Design
Start with a sample that represents the question
A beautiful test on a bad sample is still a bad sample. Decide whether you need a composite, a core split, or a grab sample that represents a specific zone. Keep track of moisture, oxidation, and storage history. A sample that has sat wet in a bucket for months is not the same feed the plant will see.
Know the feed before you judge the concentrate
Head assay, mineralogy, particle size, and liberation are not optional extras. They are the context that makes your flotation numbers mean something. If you do not know what went into the cell, you cannot tell whether a recovery result is a disaster, a success, or a sign that the feed was mostly gangue. At minimum, assay the feed and the products, and check the mass balance.
Write the question down
“Test flotation” is not a question. “Can we reject more pyrite at a coarser grind?” is. “Does this collector improve recovery without hurting grade?” is. A clear question tells you which variables to change, which ones to hold, and what result would count as useful. It also stops the program from turning into a pile of tests that nobody can compare.
Design the test program around the decision, not around the machine’s capacity. If you need to compare three grind sizes and two collectors, say so before you start. A simple matrix is easier to interpret than a random collection of runs, and it makes it obvious when a condition is missing. Keep the number of variables small enough that you can still see the effect you care about.
Running the Test Without Fooling Yourself
Slurry preparation and conditioning
Weigh the sample, add water, set the pH, and condition the pulp long enough for the reagents to do their job. The order of reagent addition matters. So does the mixing intensity. Record the actual conditions, not the conditions you intended. A small drift in solids content or pH can change the froth and send you chasing the wrong explanation.
Air, agitation, and froth depth
Set the air rate and impeller speed deliberately, then keep them constant for the test. If you change them mid-run, you will not know whether the result came from the reagent or from the extra turbulence. Froth depth deserves the same respect. It affects drainage, grade, and the amount of entrained material that reports to the concentrate.
Collect the froth consistently
Froth removal is where many lab programs quietly fall apart. One operator skims aggressively, another lets the froth build up and then pulls a thick slice. Use a consistent scraping pattern and collect timed concentrates. If the test is meant to compare conditions, the froth removal should be the same in every run. Otherwise you are measuring wrist action, not flotation.
Clean, weigh, and close the mass balance
Clean the cell between tests. Reagent carryover and leftover solids can contaminate the next run, especially when you are testing low doses. Dry and weigh every product, then assay. A mass balance that does not close is a warning sign, not a rounding error. Repeat a test if the numbers look impossible; it is cheaper than building a decision on bad data.
Reading Results Like a Pro
Look at the whole curve
Cumulative grade-recovery curves show the big picture. Incremental curves show what each timed concentrate contributed. If the first concentrate is rich and the last is nearly barren, you may be running longer than necessary. If the last concentrate is still strong, the circuit may need more residence time or a different reagent scheme.
Repeatability before cleverness
Run duplicates before you build a theory. If two identical tests differ by more than your process can tolerate, the next change is not a process improvement; it is a coin toss. Repeatability also tells you whether a small difference between reagents is real. Many beautiful trends disappear when someone finally runs the same condition twice.
Let mineralogy explain the surprise
When recovery is low, do not assume the reagent is wrong. Look at liberation, slimes, oxidation, and gangue mineralogy. When grade is low, look at entrainment, froth stability, and fine gangue. A good assay tells you what happened. Mineralogy often tells you why.
Watch the water
Lab water is not plant water. Hardness, dissolved ions, residual reagents, and recycled water can all change flotation. If your plant recycles water, test with water that resembles the real process, or at least run a sensitivity check. A reagent that shines in distilled water may behave very differently in a process stream.
Keep a lab notebook that a stranger could follow. Record the sample ID, head assay, grind, pulp density, pH, reagent doses, air rate, impeller speed, froth depth, collection times, and any odd behavior. The froth may look different on a humid day or after a reagent bottle has been open for months. Context is part of the result.
Common Mistakes in Lab Flotation
Most lab flotation problems are not exotic. They are ordinary habits that quietly destroy comparability.
- Testing one sample and treating it as the whole deposit.
- Ignoring the head assay, then wondering why recovery does not add up.
- Changing grind, reagent dose, air rate, and froth depth in the same run.
- Scraping the froth differently from one test to the next.
- Chasing recovery while ignoring concentrate grade and downstream cost.
- Reusing dirty equipment and carrying reagent into the next test.
- Scaling a single batch result directly to a plant circuit.
From Lab to Plant: What Scale-Up Really Needs
A lab flotation cell is a batch device. A plant cell is a continuous, interconnected system with recycle loads, residence time distributions, and hydrodynamics that a bench test cannot fully reproduce. Scale-up is not a matter of multiplying one concentrate weight by a factor and calling it a flowsheet.
What scale-up needs is a defensible range. Locked-cycle tests show how circulating loads affect grade and recovery. Variability tests show how the process responds to different feed types. Pilot testing adds continuous operation and better hydrodynamics. The lab’s job is to narrow the options and identify the risks, not to pretend that a single batch test is a plant design.
Choosing and Using an Experimental Flotation Machine
Look beyond the headline size. Match the cell to your sample mass, the number of tests you need, and the concentrate volumes you expect. Check how easily the unit can be cleaned, how froth is removed, how air and agitation are controlled, and how you will record the conditions. Ask about contact materials if corrosion or contamination matters.
Practical details decide whether the machine becomes a useful tool or a bench ornament. Can you change the impeller speed without dismantling half the unit? Is the froth scraper consistent? Can you see the froth? Is the cell easy to empty and clean? These are not glamorous questions, but they are the ones that determine whether your data will be repeatable.
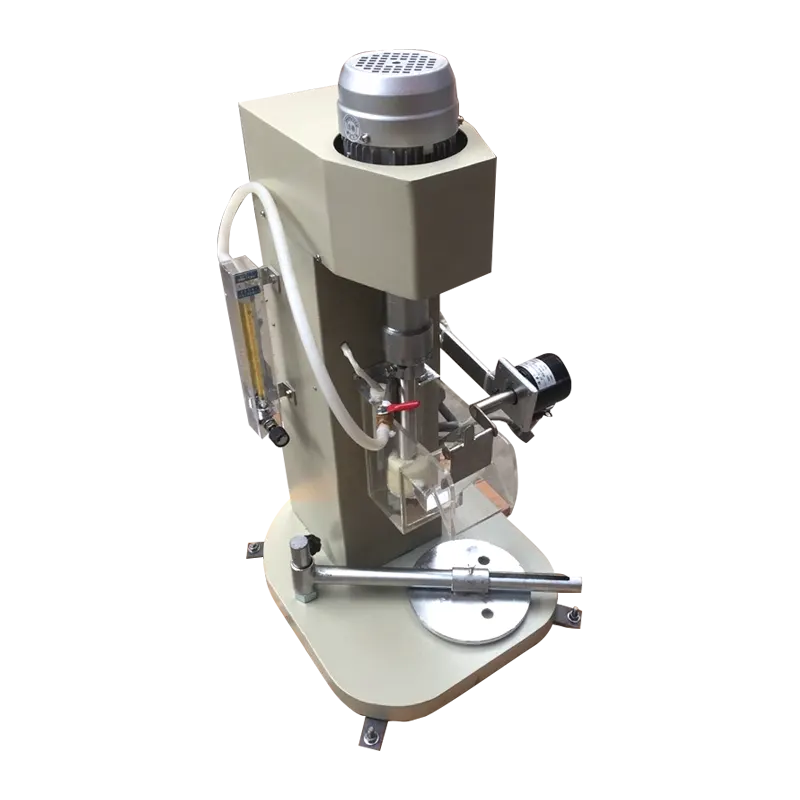
For a clear starting point, revisit TENCAN’s experimental flotation machine and compare its layout with the way your lab actually works. The right machine is the one that makes good test design easier, not the one with the longest feature list.
A Simple Workflow You Can Repeat
- Define the question and select a representative sample.
- Characterize the feed: assay, mineralogy, size, and liberation.
- Set a baseline and run duplicates.
- Change one variable at a time and record everything.
- Collect timed concentrates with consistent froth removal.
- Dry, weigh, assay, and close the mass balance.
- Plot grade-recovery curves and check repeatability.
- Confirm key findings with more samples or locked-cycle work.
None of this is glamorous. It is, however, how a lab turns froth into evidence.
Quick Answers to Common Lab Questions
How much sample do I need?
Enough to run a baseline, duplicates, and a few variable tests, plus assay charges. The right amount depends on your cell size and test plan; running out halfway through a program is worse than starting with a slightly larger composite.
Can I use tap water?
You can use tap water for early scoping if you keep it consistent, but do not assume the result will match plant water. If water chemistry is a risk, run a comparison with process water or a synthetic water that represents the plant.
How many tests are enough?
Enough to see a trend and check repeatability. If a change is smaller than the scatter between duplicates, you need more repeats, not more opinions. Stop when the next test will not change the decision.
Flotation is part science, part craft, and part bookkeeping. The science explains why particles attach to bubbles. The craft is in the froth, the reagent addition, and the patience to run a clean test. The bookkeeping is what lets you compare one test with another and learn something. An experimental flotation machine gives you a small, controlled place to practice all three.
Related Products
Get In Touch
Our professional team will reply to you within one business day. Please feel free to contact us!