
Sieve Testing Equipment: The Basics

What Is Sieve Testing Equipment and Why Should You Care?
If you work with powders, granules, or any particulate material, you've probably heard of sieve testing. But what exactly is sieve testing equipment, and why is it such a big deal? Simply put, sieve testing equipment is a set of tools used to determine the particle size distribution of a powder or granular sample. It's a fundamental analysis technique in many industries, from pharmaceuticals to food processing, mining, and even 3D printing.
Imagine you're making a batch of chocolate. The texture of the final product depends heavily on the size of the cocoa particles. If they're too large, the chocolate feels gritty; if they're too small, it might feel too smooth or even have different melting properties. Sieve testing helps you control that. It's like a quality control checkpoint for particle size.
In this article, we'll walk you through everything you need to know about sieve testing equipment: how it works, the different types, how to choose the right one, and some practical tips to get accurate results. We'll also talk about how sample preparation—often done with a planetary ball mill—can make or break your sieve analysis. So, let's dive in.
How Does Sieve Testing Work? The Core Principles
At its heart, sieve testing is pretty straightforward. You take a sample of powder, put it through a stack of sieves with different mesh sizes, shake it, and then weigh how much material is retained on each sieve. The results give you a particle size distribution curve. But while the concept is simple, the devil is in the details.
A sieve is essentially a woven wire mesh or a perforated plate with precise openings. The "mesh size" or "sieve number" tells you the nominal opening size. For example, a 200-mesh sieve has openings of about 74 microns. When you stack sieves with decreasing opening sizes from top to bottom, you can separate particles into different size fractions.
The shaking action is crucial. You need to move the particles around so they have a chance to fall through the openings if they're small enough. If you just let the powder sit, particles may clump together or simply not encounter the openings. That's where sieve shakers come in. They provide a consistent, repeatable motion—whether it's a horizontal shaking, a tapping action, or a combination of both.
But here's a key point: sieve testing doesn't measure the size of individual particles directly. Instead, it classifies particles based on whether they can pass through a given opening. So a particle that is 50 microns in diameter will pass through a 100-mesh sieve (150 microns) but be retained on a 200-mesh sieve (74 microns). This gives you a size range, not an exact size. For many applications, that's perfectly fine—you just need to know the distribution.
The Sieve Stack: A Simple but Powerful Tool
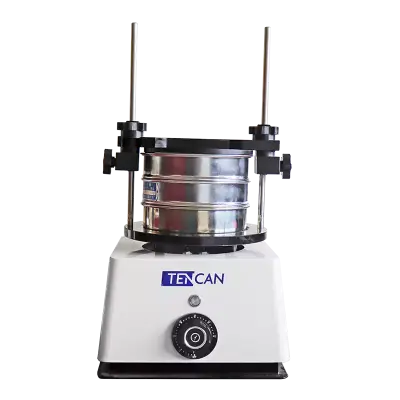
A typical sieve stack includes a lid, a series of sieves (usually 5 to 8), and a receiving pan at the bottom. The sample is placed on the top sieve, which has the largest openings. As the stack is shaken, particles move down through the sieves until they reach a sieve where they can't pass through. After shaking, you carefully weigh the material on each sieve. The weight percentages give you the size distribution.
One common question: how do you know when the sieving is complete? The standard rule is to shake until the amount of material passing through a sieve is less than 1% of the total sample per minute. In practice, that often means 10 to 15 minutes for most powders, but it can vary. Some standards, like ASTM E11, provide guidance. You can also use a "end point" test: shake for a set time, then weigh the pan, shake for another minute, and weigh again. If the change is less than 1%, you're done.
Another important factor is the sieve diameter. Standard sieves come in 8-inch (200 mm) or 12-inch (300 mm) diameters. Smaller sieves (like 3-inch) are used for small samples. The diameter affects the sample capacity and the sieving efficiency. Larger sieves can handle more material but may require longer shaking times.
Shaking Methods: Mechanical, Electromagnetic, and Sonic
There are several ways to shake a sieve stack, and the method you choose can affect your results. The most common are:
- Mechanical shakers: These use a motor to create a horizontal or vertical motion, often with a tapping arm. They're robust and can handle large samples. The motion is usually a combination of vibration and tapping, which helps particles move through the sieves. They're noisy and can cause some particle breakage, but they're workhorses for most materials.
- Electromagnetic shakers: These use electromagnets to drive the sieve stack in a three-dimensional motion. They're quieter and more precise, and you can adjust the amplitude and frequency. The motion is smooth and can be tailored to delicate materials. They're often used in research labs where reproducibility is critical.
- Sonic shakers: These use sound waves to create a gentle, high-frequency vibration. They're great for fine powders that tend to agglomerate, as the sound waves help break up clumps. The sieving action is very gentle, so there's minimal particle attrition. However, they're expensive and have lower throughput—you can only test small samples (typically a few grams).
Each method has its pros and cons. For example, sonic shakers are excellent for very fine powders (below 45 microns) because they don't rely on mechanical impact, which can cause particle attrition. But they're more expensive and have lower throughput. Mechanical shakers are workhorses for larger particles, but they can be noisy and may cause some particle breakage.
There's also the option of a manual shaker, which is just a frame you shake by hand. They're inexpensive but not suitable for reproducible results. For any serious analysis, you'll want a mechanical or sonic shaker.
Key Components of a Sieve Testing Setup
To do sieve testing, you need more than just a sieve and a shaker. A complete setup includes:
- Sieves: Made from stainless steel, brass, or nylon. The choice depends on the material being tested and the standard you follow. You'll need a set of sieves with certified openings. Stainless steel is the most common because it's durable and resistant to corrosion. Brass is used for some standard sieves, but it's softer and wears faster. Nylon sieves are used for materials that might react with metal or for very fine sizes.
- Sieve shaker: As discussed, this provides the motion. Some shakers come with a timer and adjustable settings. You can also get shakers that accommodate different sieve diameters.
- Receiving pan and lid: To collect the fines and keep the sample contained. The pan should be clean and dry before each use.
- Balance: An analytical balance with readability of 0.01 g or better. You need to weigh the sample and the fractions accurately. For small samples, you might need a balance with 0.001 g readability.
- Sample splitter: To get a representative sub-sample from your bulk material. This is critical because you can't test the whole batch. Common types include riffle splitters and rotary splitters.
- Cleaning tools: Brushes and ultrasonic cleaners to keep sieves clean. Clogged sieves are a major source of error. You can also use a soft air jet, but be careful not to damage the mesh.
You might also need a timer, a spatula, and a notebook (or software) to record data. Some modern shakers have digital controls and can store programs, which makes it easy to repeat a procedure exactly.
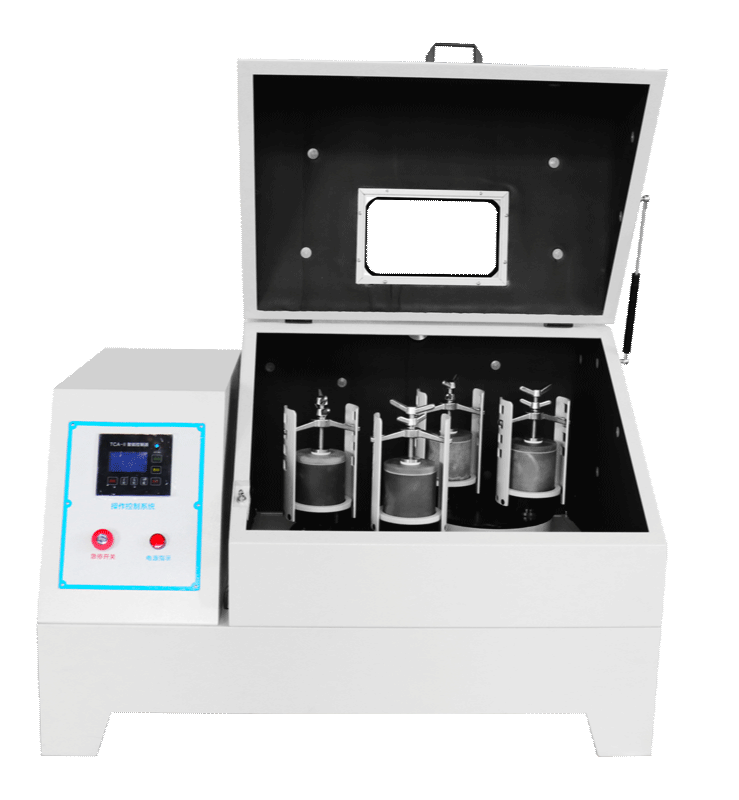
Caption: A planetary ball mill can be a valuable tool for preparing samples before sieve testing.
Types of Sieve Testing Equipment
There's a wide range of sieve testing equipment on the market, from simple manual shakers to fully automated systems. Let's break down the main categories.
Vibratory Sieve Shakers
Vibratory shakers are the most common type. They use a motor with an eccentric weight to create a vibration. Some models also have a tapping action to help particles pass through. They're versatile and can handle a wide range of particle sizes, from about 20 microns to several millimeters. The amplitude and frequency can often be adjusted, which is useful for different materials. For example, a fragile material might need a gentler shake to avoid breaking particles.
One thing to watch out for: vibratory shakers can cause some particle size reduction if the material is brittle. So if you're testing a fragile powder, you might want to reduce the shaking time or use a different method. Also, the noise level can be high, so you might want to place them in a separate room.
Sonic Sieve Shakers
Sonic shakers use a column of air and sound waves to move particles. They're particularly effective for fine powders (down to 5 microns) because the sound waves help de-agglomerate the material. The sieving action is gentle, so there's minimal particle breakage. However, sonic shakers are typically more expensive and have a lower capacity—you can only test small samples. They're often used in research and quality control for pharmaceuticals and advanced materials.
The way it works is that a sound wave is generated and transmitted through the sieve stack, causing the particles to vibrate and move. The frequency is usually around 50-60 Hz, which is in the audible range. Some models use a higher frequency for even finer powders. The gentle action means you can sieve materials that would otherwise clog or break in a mechanical shaker.
Air Jet Sieves
Air jet sieves are a bit different. Instead of a stack of sieves, they use a single sieve and a rotating air jet to blow particles through the mesh. This method is great for very fine powders and is often used for materials that tend to clog, like pigments or toners. The air jet keeps the sieve clean and prevents blinding. However, you only get one cut point per test, so it's not a full particle size distribution unless you do multiple tests with different sieves.
Air jet sieves are also used for materials that are sensitive to mechanical agitation, as the air jet is very gentle. They're common in the cement and mineral industries for testing fine powders.
There are also manual shakers, which are just a frame you shake by hand. They're inexpensive but not suitable for reproducible results. For any serious analysis, you'll want a mechanical or sonic shaker.
Understanding Sieve Sizes and Standards
If you're new to sieve testing, the terminology can be confusing. Sieve sizes are usually expressed in mesh, microns, or millimeters. Let's clarify.
Mesh: This is the number of openings per linear inch. So a 100-mesh sieve has 100 openings per inch. The higher the mesh number, the smaller the openings. However, mesh isn't a precise measurement because the wire diameter affects the opening size. So two 100-mesh sieves from different manufacturers might have slightly different openings.
Microns (µm): This is the actual opening size. One micron is one-thousandth of a millimeter. A 100-mesh sieve typically has an opening of 150 microns. Micron is the preferred unit for scientific work because it's precise.
Millimeters (mm): Used for larger openings, usually above 1 mm. For coarse materials, you might see sieve sizes like 5 mm, 10 mm, etc.
There are several standards that define sieve specifications. The most common are:
- ASTM E11: North American standard for woven wire test sieve cloth and test sieves. It specifies the nominal opening sizes and permissible variations.
- ISO 3310-1: International standard for test sieves. It's similar to ASTM but with some differences in tolerances.
- Tyler series: An older series that uses mesh numbers, but it's still used in some industries. The Tyler series is based on the number of openings per inch, but the wire diameters are specified.
When you buy a sieve, it should come with a certificate that states the nominal opening size and the actual measured openings. This is important for traceability. You should keep these certificates on file.
It's also worth noting that sieve openings are not perfectly square. The weaving process creates a slightly irregular opening. The standard allows for a certain percentage of oversize or undersize openings. So even a certified sieve has some variability. That's why it's important to use sieves from a reputable manufacturer and to calibrate them periodically.
Sample Preparation: The Often-Overlooked Step That Makes or Breaks Your Analysis
Before you even think about sieving, you need to prepare your sample. This step is critical and often overlooked. If your sample isn't representative, or if the particles are agglomerated, your sieve results will be meaningless.
The first step is to take a representative sub-sample. You can't test an entire truckload of powder. You need to use a sample splitter—like a riffle splitter or a rotary splitter—to get a small, representative portion. The goal is to reduce the sample size while maintaining the same particle size distribution as the bulk. This is easier said than done, especially for cohesive powders. A rotary splitter is often better for fine powders because it doesn't rely on gravity flow, which can be inconsistent for cohesive materials.
Next, you may need to dry the sample. Moisture can cause particles to stick together, leading to inaccurate results. Typically, you dry the sample in an oven at a temperature that won't alter the material. For some materials, you might need to use a desiccator. The drying temperature and time depend on the material. For example, you might dry at 105°C for 2 hours, but for heat-sensitive materials, you might use a lower temperature and longer time, or even a vacuum oven.
Then, there's the issue of agglomeration. Fine particles love to clump together. If you don't break up those clumps, they'll behave like larger particles during sieving, and you'll overestimate the coarse fraction. So, you need a way to de-agglomerate the sample. This is where a planetary ball mill can be incredibly useful.
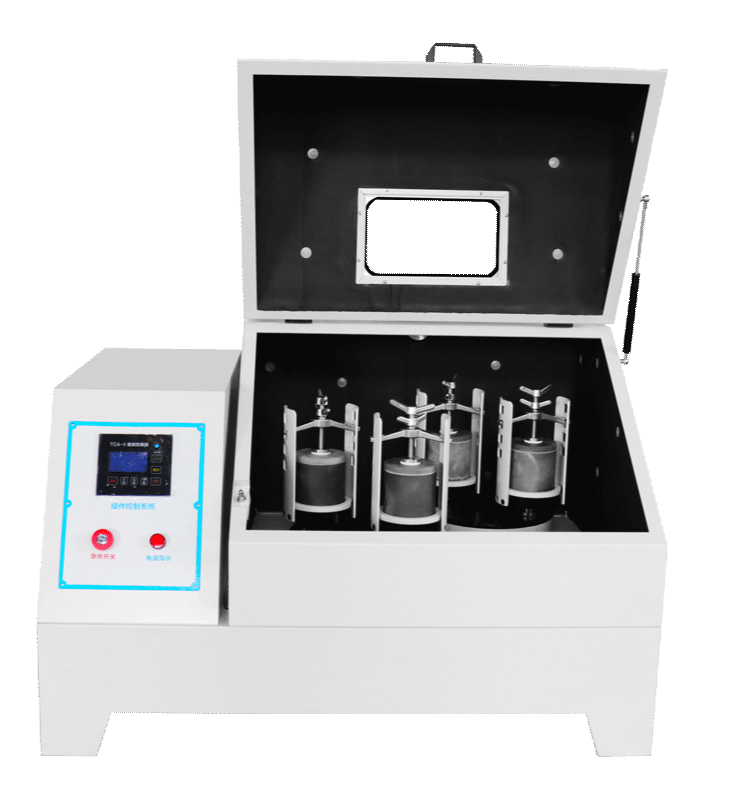
Wait, a ball mill? Isn't that for grinding? Yes, but it's also excellent for gently breaking up agglomerates. A dual planetary ball mill, like the one from TENCAN, uses two sun wheels that rotate in opposite directions, creating a complex motion that efficiently breaks down agglomerates without necessarily grinding the primary particles into dust. This is especially important if you want to preserve the original particle size while just breaking up clumps. You can check out the Dual Planetary Ball Mill for more details.
Of course, if your material is already in a nice, free-flowing state, you might not need a mill. But for many powders—especially those that have been stored or transported—de-agglomeration is a must. A planetary ball mill can also be used to reduce the particle size of a sample to a specific range before sieve testing. For example, if you want to test the particle size distribution of a material after grinding, you can use the mill to produce the sample, then sieve it.
Using a ball mill for sample preparation has another advantage: consistency. By controlling the milling time and speed, you can ensure that every sample is prepared in the same way, which improves the reproducibility of your sieve analysis.
So, if you're setting up a sieve testing lab, consider adding a planetary ball mill to your equipment list. It's a versatile tool that can handle both de-agglomeration and size reduction. The Dual Planetary Ball Mill from TENCAN is a good example of a machine designed for efficient, reproducible sample preparation.
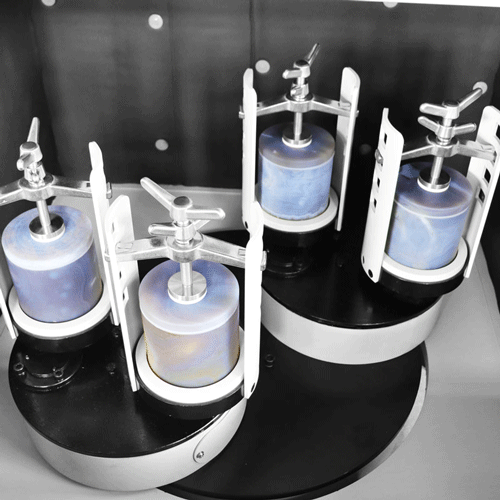
Caption: The dual planetary ball mill provides efficient mixing and de-agglomeration.
Size Reduction with Ball Mills
Sometimes, you don't just want to break up agglomerates; you want to actually reduce the particle size. For example, if you're developing a new product and need to achieve a specific particle size distribution, you might start with a coarse material and grind it down. A planetary ball mill is excellent for this because it can grind materials to sub-micron sizes.
The dual planetary ball mill is particularly effective because it combines the centrifugal forces of the rotating sun wheel and the rotating grinding jars. This creates a high-energy impact that quickly reduces particle size. You can adjust the milling time, speed, and ball-to-powder ratio to achieve the desired fineness. After milling, you can then run a sieve analysis to confirm the particle size distribution.
It's important to note that ball milling can also change the particle shape and surface properties, so it's not always suitable for every material. But for many inorganic materials, it's a standard method for sample preparation.
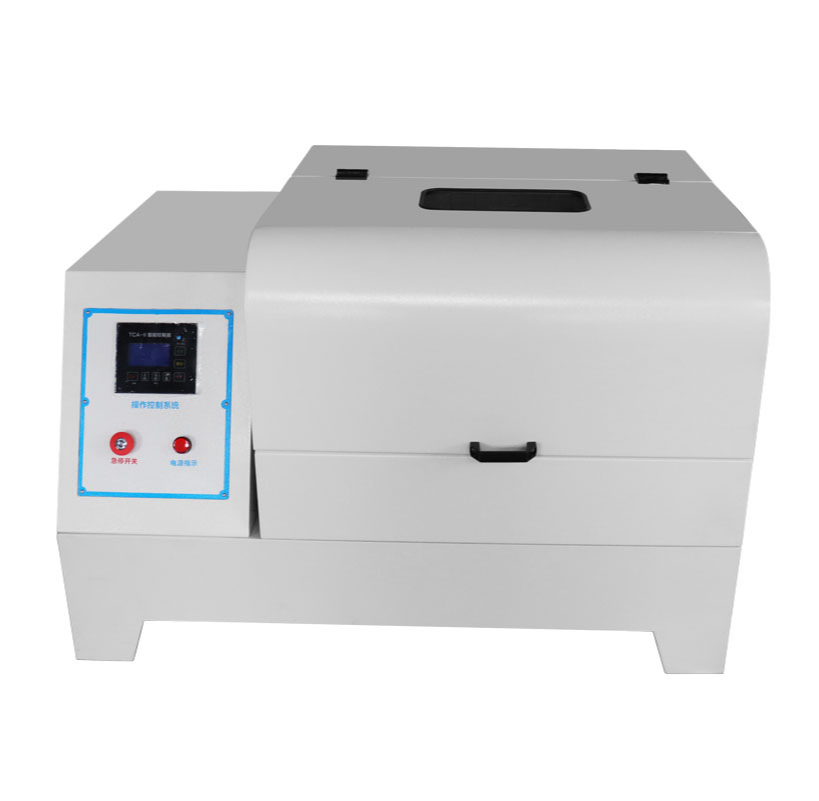
Caption: The Dual Planetary Ball Mill from TENCAN is designed for efficient sample preparation.
How to Choose the Right Sieve Testing Equipment
Choosing the right sieve testing equipment depends on several factors. Let's go through them one by one.
Particle Size Range
What's the size range of your material? If you're dealing with coarse particles (above 100 microns), a standard vibratory shaker will work fine. For fine powders (below 45 microns), you might need a sonic shaker or an air jet sieve. Some shakers can handle both, but you need to check the specifications. Also, consider the smallest sieve you plan to use. If you're going down to 20 microns, a sonic shaker is probably necessary because mechanical shaking may not be effective.
Sample Capacity
How much sample do you need to test? If you're doing quality control on large batches, you might need a shaker that can handle a few hundred grams. Sonic shakers typically have smaller capacities (a few grams). Think about your throughput requirements. If you need to test many samples per day, you'll want a shaker that is easy to load and unload, and perhaps one that can run multiple stacks at once.
Material Characteristics
Is your material fragile? Does it tend to agglomerate? Is it abrasive? Abrasive materials can wear out sieves quickly, so you might need more durable sieves. Fragile materials might require gentle shaking to avoid particle breakage. Agglomerated materials might need a sonic shaker or a pre-treatment step. If your material is electrostatic, you might need to add an anti-static agent or use a grounded shaker.
Standards and Compliance
Do you need to comply with specific standards, like ASTM, ISO, or USP? Different standards specify different procedures and equipment. Make sure your equipment meets the requirements. For example, ASTM E11 covers sieve specifications, while ASTM E323 covers sieve testing procedures. If you're in the pharmaceutical industry, you might need to follow USP <786> for particle size analysis.
Budget and Maintenance
Of course, budget matters. Manual shakers are cheap but not reproducible. Mechanical shakers are a good middle ground. Sonic shakers are expensive but offer the best performance for fine powders. Also consider maintenance costs: sieves need to be replaced periodically, and shakers need calibration and repair. It's also worth considering the availability of accessories, like test sieves with different mesh sizes, and software for data analysis. Some manufacturers offer complete packages that include everything you need.
Applications of Sieve Testing Across Industries
Sieve testing is used in a surprisingly wide range of industries. Here are a few examples:
- Pharmaceuticals: Particle size affects drug dissolution, bioavailability, and manufacturing processes. Sieve testing is used to control the size of active ingredients and excipients. It's also used to ensure blend uniformity.
- Food and Beverage: From flour to sugar to cocoa powder, particle size affects texture, taste, and processing. Sieve testing ensures consistency. For example, the particle size of flour affects the texture of baked goods.
- Mining and Minerals: Ore processing, cement production, and aggregate testing all rely on sieve analysis to control product quality. In mining, sieve testing is used to determine the liberation size of minerals.
- Chemicals: Catalysts, pigments, and detergents are just a few examples where particle size is critical. For catalysts, the particle size affects surface area and reaction rates.
- 3D Printing: Metal powders for additive manufacturing must have a specific particle size distribution to ensure good flowability and packing density. Sieve testing is used to certify powders.
- Agriculture: Fertilizers and pesticides are often tested for particle size to ensure proper application and effectiveness. Uniform particle size ensures even spreading.
In each of these industries, the choice of sieve testing equipment and sample preparation method can make a big difference. For example, in 3D printing, you might use a sonic shaker to avoid damaging the delicate powder particles, while in mining, a robust mechanical shaker is more appropriate.
How to Interpret Sieve Analysis Results
Once you've run your sieve test, you'll have a set of weights for each sieve. The next step is to convert those weights into a particle size distribution. The standard way is to calculate the percentage of material retained on each sieve and the cumulative percentage passing.
Let's say you have a stack of sieves with openings of 500, 250, 125, and 63 microns, plus a pan. You weigh the material on each sieve. The total weight should be close to the initial sample weight (minus any loss). Then you calculate the percentage retained on each sieve. For example, if 20% is retained on the 250-micron sieve, that means 20% of the particles are larger than 250 microns but smaller than 500 microns.
You can then plot a cumulative distribution curve: on the x-axis, you have the sieve opening (log scale), and on the y-axis, the cumulative percentage passing. From this curve, you can read off the D-values: D10, D50, and D90. D50 is the median particle size—50% of the particles are smaller than this size. D10 is the size at which 10% of the particles are smaller, and D90 is the size at which 90% are smaller. These values are often used in specifications.
It's also common to report the span, which is (D90 - D10) / D50. A smaller span indicates a narrower particle size distribution. This is important for many applications; for example, in ceramics, a narrow distribution leads to better packing and sintering.
Tips for Accurate and Reproducible Sieve Analysis
Even with the best equipment, you can get inaccurate results if you don't follow proper procedures. Here are some tips to help you get reliable data:
- Use a representative sample: Always use a sample splitter to avoid bias. Don't just scoop a bit off the top.
- Control the sample size: Too much sample can overload the sieves and cause inaccurate results. Too little sample can lead to poor statistics. Follow the standard recommendations (usually 25–100 g for a 200 mm sieve).
- Shake long enough: Don't cut the shaking time short. Use the 1% rule: continue shaking until less than 1% of the sample passes through a sieve in one minute. For most powders, 10–15 minutes is typical.
- Keep sieves clean: Clogged or dirty sieves are a major source of error. Clean them after each use with a soft brush or ultrasonic cleaner. Never use harsh chemicals that could damage the mesh.
- Calibrate your sieves: Sieves wear out over time. Have them inspected and recalibrated periodically. You can use standard reference materials to check performance.
- Use the right shaking motion: Different materials require different motions. For example, a tapping action can help with powders that tend to cake, while a pure vibratory motion is better for free-flowing materials.
- Record everything: Keep detailed records of your procedure, including sample weight, shaking time, and equipment settings. This helps with troubleshooting and reproducibility.
One more tip: consider using a pre-treatment step like ball milling to break up agglomerates. As we mentioned earlier, a planetary ball mill can be a game-changer for sample prep. It ensures that your sample is homogeneous and free of clumps, which leads to more accurate sieve results.
Common Mistakes and Troubleshooting
Even experienced technicians make mistakes. Here are some common pitfalls and how to avoid them:
- Overloading the sieves: If you put too much sample on a sieve, the particles can't move freely, and the sieving efficiency drops. Stick to the recommended sample size.
- Not shaking long enough: This is probably the most common mistake. If you stop too early, you'll overestimate the coarse fraction. Use the 1% rule or a standard time.
- Using damaged sieves: A torn or worn sieve will let oversized particles through. Inspect sieves regularly and replace damaged ones.
- Ignoring agglomeration: If your powder is clumpy, you need to de-agglomerate it. Otherwise, you're measuring the size of the clumps, not the primary particles.
- Incorrect sample splitting: A non-representative sample will give you a wrong distribution. Use a proper splitter and follow the correct procedure.
- Static electricity: Fine powders can become electrostatically charged and stick to the sieve or the pan. You can use an anti-static device or a grounded shaker to mitigate this.
If your results seem off, go through this checklist. Often, the problem is in the sample preparation or the shaking time.
Maintenance and Calibration of Sieve Testing Equipment
To keep your sieve testing equipment in top shape, you need a regular maintenance schedule. Here's what to do:
- Inspect sieves regularly: Look for holes, tears, or loose wires. A damaged sieve will give false results. Replace any damaged sieves immediately.
- Clean sieves after every use: Use a soft brush or an ultrasonic cleaner. For stubborn particles, you can use a gentle air jet, but be careful not to damage the mesh.
- Check the shaker: Make sure the motor is running smoothly and there are no unusual noises. Lubricate moving parts as recommended by the manufacturer.
- Calibrate the shaker: Some shakers have adjustable amplitude and frequency. Periodically verify that these settings are accurate. You can use a vibration meter or a tachometer.
- Verify sieve openings: Use a certified reference material or a microscope to check that the sieve openings are still within specification. Typically, this is done annually or after a certain number of uses.
- Store sieves properly: Keep sieves in a dry, clean environment. Stack them carefully to avoid damage.
If you follow these steps, your equipment will last longer and your results will be more reliable. Remember, sieve analysis is only as good as the equipment and procedures you use.
The Future of Sieve Testing: Automation and Digital Solutions
Like many areas of analytical testing, sieve testing is becoming more automated and digital. Some modern shakers have built-in balances and software that automatically record the weights and calculate the particle size distribution. This reduces human error and speeds up the process.
There's also a trend toward dynamic image analysis, which can measure particle size and shape in real time. While this isn't a replacement for sieve testing, it can complement it. For example, you might use image analysis for routine quality control and sieve testing for certification.
Another development is the use of 3D-printed sieves, which can be customized for specific applications. However, these are still in the research phase and are not yet widely used in industry.
Frequently Asked Questions (FAQ)
How long should I shake my sieves?
The standard rule is to shake until less than 1% of the sample passes through a sieve in one minute. For most powders, 10–15 minutes is sufficient. But it depends on the material and the sieve sizes. Always follow the relevant standard.
Can I use any sieve for any material?
Not always. You need to consider the material's abrasiveness, reactivity, and particle size. Stainless steel sieves are the most common, but for very fine powders, you might need a special sieve. Also, if the material is reactive, you might need a non-metallic sieve.
My results are not reproducible. What should I do?
Check your sample preparation first. Are you using a representative sample? Is the sample properly de-agglomerated? Also, check your shaking time and the condition of your sieves. If the problem persists, try using a different shaking motion or a different shaker.
Do I need to calibrate my sieves?
Yes, sieves should be calibrated periodically. The frequency depends on usage. For critical applications, annual calibration is recommended. You can send your sieves to a calibration lab or use a certified reference material.
What is the difference between a sieve and a screen?
In the context of particle size analysis, the terms are often used interchangeably. However, a "sieve" usually refers to a laboratory test sieve with a woven wire mesh, while a "screen" often refers to a larger industrial screening device. But the principle is the same.
Conclusion: Putting It All Together
Sieve testing equipment is a fundamental tool for anyone working with powders and granules. Whether you're in pharmaceuticals, food, mining, or advanced materials, understanding particle size distribution is key to quality control and product development.
We've covered the basics of how sieve testing works, the different types of equipment, and how to choose the right one for your needs. We've also highlighted the importance of sample preparation—and how a planetary ball mill like the Dual Planetary Ball Mill can help you get more accurate results by breaking up agglomerates and ensuring a homogeneous sample.
If you're looking to upgrade your lab's sample preparation capabilities, TENCAN's Dual Planetary Ball Mill is a reliable choice. It's designed for efficiency and reproducibility, making it a valuable addition to any sieve testing workflow.
So, the next time you run a sieve analysis, remember: the quality of your results starts long before you shake that stack of sieves. It starts with proper sampling, de-agglomeration, and a good understanding of your equipment. With the right tools and techniques, you can achieve accurate, repeatable particle size data that you can trust.
Happy sieving!
Related Products
Get In Touch
Our professional team will reply to you within one business day. Please feel free to contact us!