
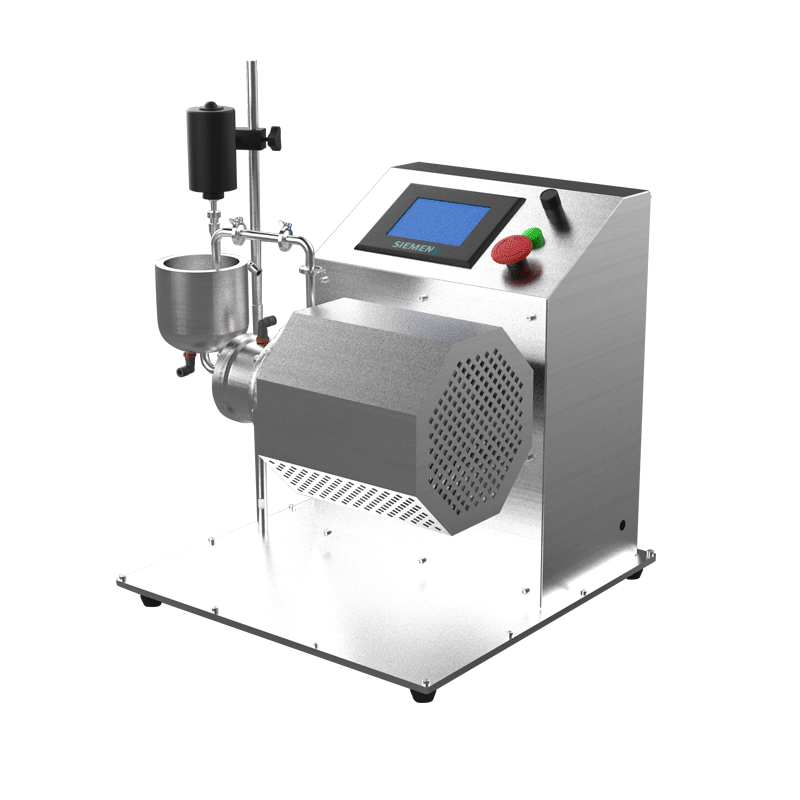
Lab Horizontal Bar Pin Nano Sand Mill: How Wet Grinding Makes Fine Particles

If you work with pigments, battery slurries, ceramics, inks, or any powder that refuses to behave, you have probably heard the phrase “nano sand mill” thrown around like a magic wand. It is not magic. It is a wet grinding machine that uses tiny beads, a spinning rotor, and a lot of controlled energy to break particles down and disperse them evenly. The lab horizontal bar pin nano sand mill is the bench-scale version of that idea: a compact tool for testing recipes before you commit to production.
In this guide, we will walk through what the machine does, how the “horizontal” and “bar pin” parts change the game, and what to check before you buy one. You do not need a PhD in colloid science to follow along. You just need curiosity about what happens inside that chamber—and a healthy respect for grinding media.
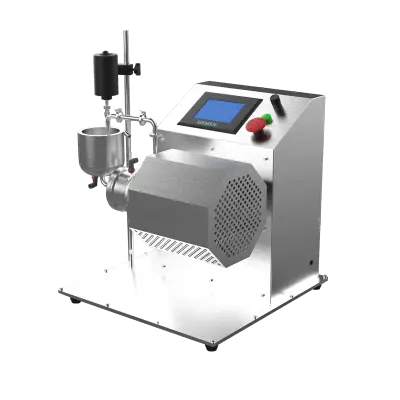
If you want to see the specific machine behind this discussion, take a look at the TENCAN lab horizontal bar pin nano sand mill. We will refer back to it as we go.
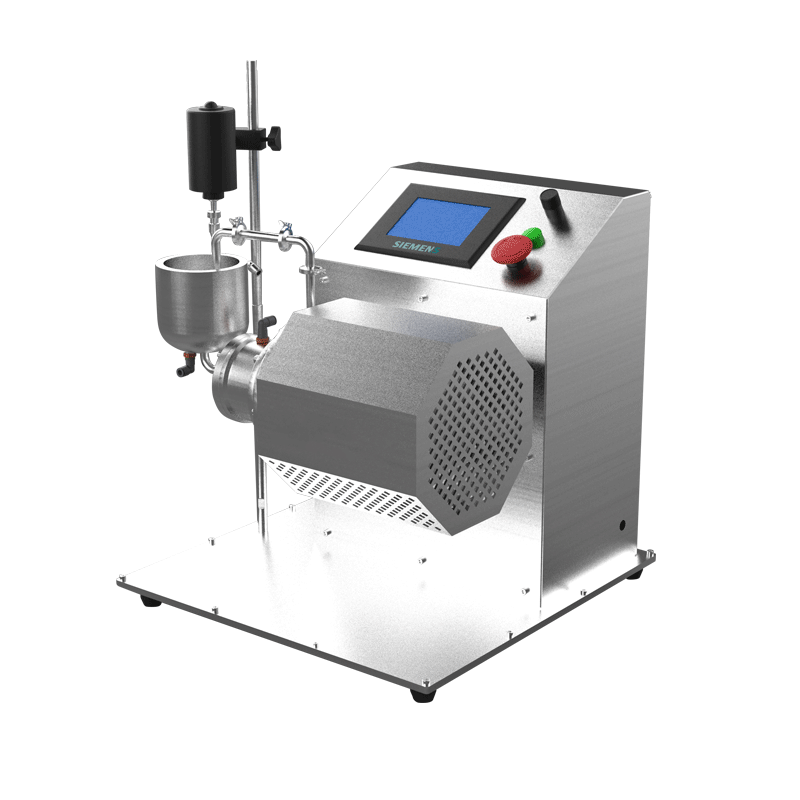
What Is a Lab Horizontal Bar Pin Nano Sand Mill?
A sand mill is a wet grinding mill. You mix your powder with a liquid to make a slurry, pump that slurry into a chamber, and let small grinding beads—often called media—do the dirty work. The rotor spins, the beads tumble and collide, and the particles get caught in the crossfire. The result is a finer, more uniform dispersion.
The “horizontal” part means the grinding chamber sits on its side, like a rolling pin, rather than standing up like a blender. The “bar pin” part refers to the rotor design: instead of a smooth disc or a simple paddle, the rotor carries pins or bars that create strong shear and impact. “Nano” is the ambition—the ability to reach very fine particle sizes, typically in the submicron or nanometer range, depending on the material and the recipe.
At lab scale, this machine is not about making truckloads of product. It is about learning fast. You can test formulations, compare media sizes, study viscosity changes, and generate data that helps you scale up without flying blind. That is why lab sand mills are common in R&D labs, application centers, and pilot plants.
The Core Idea: Grinding Is a Team Sport
Imagine trying to crush a piece of chalk with a hammer. One hit might break it into chunks. More hits make smaller chunks. But if you keep hitting the same spot, you eventually make dust—and you also make heat. Grinding is similar, except the “hammer” is a swarm of tiny beads, and the “chalk” is your powder. The machine’s job is to deliver energy to the beads in a controlled way.
Three players matter: the particles, the grinding media, and the machine. The particles have a size, a shape, and a tendency to stick together. The media have a size, density, and hardness. The machine controls how fast the rotor spins, how the slurry flows, and how much energy enters the chamber. When those three players work together, you get fine particles. When they fight, you get heat, wear, and a headache.
The bar pin rotor is designed to keep the media moving in a busy, chaotic pattern. Pins create local zones of high shear, which helps tear apart agglomerates—clusters of particles held together by weak forces. The horizontal chamber helps the media distribute more evenly along the length of the mill. In plain language: fewer dead spots, more consistent grinding.
How the Machine Works, Step by Step
Let us follow the slurry on its journey. The exact plumbing varies by model, but the logic is the same.
1. Feed the slurry
Your powder and liquid are pre-mixed into a slurry. This step matters more than most people expect. If the powder is wet out poorly—meaning the liquid has not properly replaced the air on the particle surfaces—the mill will spend its energy breaking lumps instead of making nanoparticles. A good pre-dispersion gives the mill a fair start.
2. Spin the rotor
The rotor turns at a controlled speed. The bar pins push the media and slurry around, creating shear, impact, and turbulence. “Shear” is just a fancy word for layers of fluid sliding past each other. “Impact” means beads crashing into particles. Both help reduce size.
3. Let the media do the work
The grinding beads are the real workhorses. Smaller beads create more contact points, which can help with fine grinding, but they also carry less energy per bead. Larger beads hit harder but may leave a broader particle size distribution. The right balance depends on your starting particle size, target size, and the hardness of your material.
4. Separate and discharge
At the outlet, a screen or gap separates the beads from the slurry. The slurry leaves the chamber, hopefully finer than when it entered. In many lab setups, you can run the slurry through the mill multiple passes or in a recirculation loop until you reach your target. A chiller often removes the heat generated by grinding, because hot slurry can change viscosity, destabilize a formulation, or damage temperature-sensitive ingredients.
Why “Horizontal” and “Bar Pin” Matter
A horizontal chamber is not just a design choice. It changes how the media behave. In a vertical mill, gravity can cause the media to settle or stack, especially when the flow is low. A horizontal chamber encourages a more uniform bed of media along the rotor. That helps with repeatability, which is exactly what you want in a lab.
The bar pin rotor adds another layer of control. Smooth discs can create strong pumping action, but they may also produce less local shear. Pins and bars create repeated disturbances in the flow. Think of it as stirring a pot of thick soup with a spoon versus a whisk. The whisk introduces more mixing points. In a sand mill, those mixing points translate into more opportunities for beads to collide with particles.
There is a trade-off. More aggressive rotors can generate heat faster and wear media harder. That is why lab work is so valuable: you can test the rotor speed, media size, and flow rate on a small scale before you commit to a production recipe. The goal is not maximum violence. The goal is controlled energy.
What “Nano” Really Means in a Lab Sand Mill
The word “nano” gets used loosely. In practical terms, it means the mill can produce very fine particles—often below one micron, and sometimes down to the nanometer range. But here is the honest part: no mill can guarantee a nanoparticle size for every material. The result depends on the powder’s hardness, the liquid’s chemistry, the media, the stabilizers, and the time and energy you put in.
Also, average particle size is only half the story. A sample can have a small average size but still contain large lumps. That is why particle size distribution matters. A tight distribution means most particles are in a similar range. A broad distribution means you have a mix of fine and coarse particles, which can cause settling, inconsistent color, or uneven coating. When you test a nano sand mill, look at the whole curve, not just the headline number.
The lab horizontal bar pin nano sand mill is built to help you chase that curve. It gives you a controlled environment to adjust energy input, residence time, and media selection. It will not turn a bad formulation into a good one, but it will tell you quickly whether your formulation has a chance.
Where This Mill Earns Its Keep
Lab sand mills are used wherever fine particles and stable dispersions matter. In battery materials, they help mix and grind active materials and conductive additives into a uniform slurry. In ceramics, they break down agglomerates before casting or spraying. In pigments and coatings, they improve color strength, gloss, and stability. In inks, they prevent clogging and settling. In pharmaceuticals and life sciences, they support formulation work where particle size can affect dissolution or bioavailability.
The common thread is not the industry. It is the problem: you have a powder that needs to be smaller, better dispersed, or more stable. The lab mill lets you test whether wet grinding is the right answer before you invest in a larger line.
For a closer look at the machine and its configuration options, visit the lab horizontal bar pin nano sand mill product page. That is also where you will find the exact technical parameters for the model. Those numbers depend on the build, so it is worth checking the source rather than relying on a general article.
A Quick Word on Grinding Media
Grinding media are the small beads inside the chamber. They are usually made from ceramic materials such as zirconia or other wear-resistant compositions, though the exact choice depends on the application. Three things matter: size, density, and hardness.
Smaller beads give you more contact points per unit volume. That can be great for fine grinding, but small beads are also harder to separate from the slurry and may not carry enough energy to break tough particles. Larger beads hit harder, but they can leave a wider particle size distribution and cause more wear. Density affects how much energy each bead carries. Hardness affects how long the beads last and whether they contaminate your product.
Do not treat media selection as an afterthought. The wrong media can turn a good mill into a slow, hot, expensive mistake. Start with the manufacturer’s recommendation, then test. Keep notes. Your future self will thank you.
The Small Details That Decide Whether You Get Nano
If you remember one thing from this article, make it this: nano grinding is a system, not a setting. You can have the best mill in the world and still get poor results if the slurry, media, and process do not agree with each other.
Solids loading is one example. More solids means more particles to grind, but it also means higher viscosity. If the slurry becomes too thick, the media cannot move freely, and the mill starts heating the product instead of grinding it. Flow rate is another. A faster flow reduces residence time, so the slurry may exit before it has seen enough energy. A slower flow increases residence time, but it can also cause overheating and over-grinding.
Temperature control is not a luxury. Grinding energy turns into heat. If the slurry gets too hot, a temperature-sensitive ingredient may degrade, a binder may crosslink, or the viscosity may drift. A chiller and a good temperature probe are your friends. So is a logbook. Write down what you changed and what happened. The lab mill is a learning tool, and memory is a terrible database.
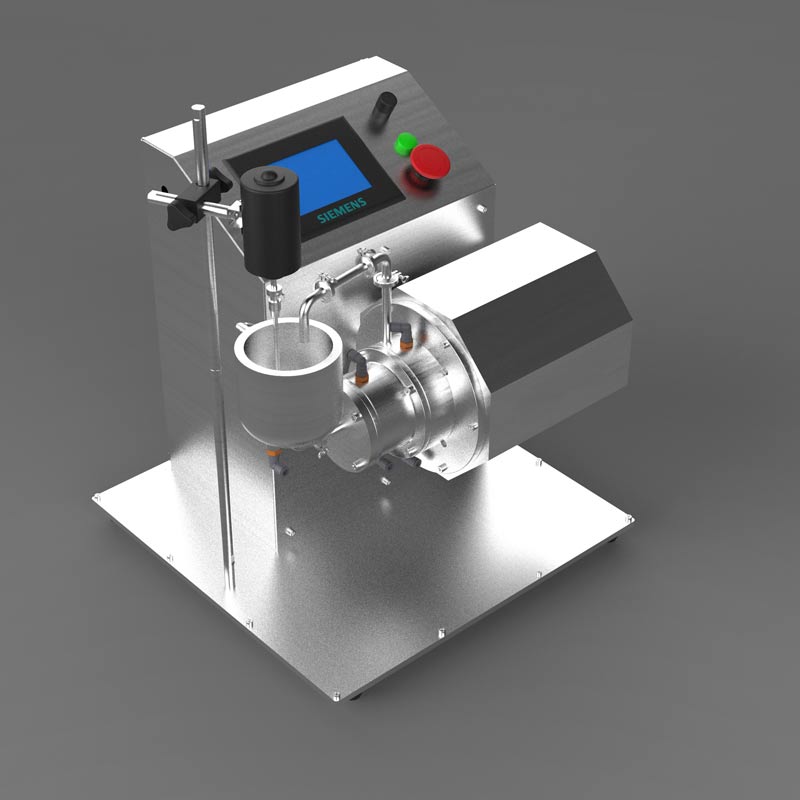
What to Check Before You Buy a Lab Horizontal Bar Pin Nano Sand Mill
Buying a lab mill is a bit like buying a good pair of running shoes. The specs matter, but so does the fit. Here are the questions worth asking.
- Chamber volume and batch size. Make sure the mill can handle the smallest batch you realistically need without wasting material, and the largest batch your lab can support.
- Rotor design and speed range. The bar pin geometry should match your target fineness and your material’s toughness.
- Media separation. A screen or gap that clogs easily will ruin your day. Ask how it handles small beads.
- Cooling and temperature control. Confirm how heat is removed and whether you can monitor slurry temperature.
- Seals and wetted materials. Check compatibility with your solvents, pH, and abrasive solids.
- Cleanability. A mill that takes forever to clean will not get used. Ask about access to the chamber and rotor.
- Controls and data. Can you record speed, temperature, flow, and power? Data makes scale-up easier.
- Support and scale-up. A good supplier helps you choose media and interpret results, not just ship a box.
For the TENCAN lab horizontal bar pin nano sand mill, the exact technical parameters are listed on the product page. Use those numbers as your starting point, then confirm the configuration with the supplier. Do not guess at critical specs. A five-minute conversation can save five weeks of frustration.
Common Mistakes That Make Good Mills Look Bad
Most lab grinding problems are not caused by a broken machine. They are caused by a process that was never given a fair chance. Here are the usual suspects.
Overloading the media. More beads do not always mean more grinding. Too much media can restrict flow, raise temperature, and wear the rotor. Follow the manufacturer’s fill guidance and adjust based on results.
Using the wrong media size. If the beads are too large, you may never reach your target fineness. If they are too small, you may not have enough energy to break the starting particles. Test a narrow range and compare particle size distribution.
Skipping pre-dispersion. If the powder is not properly wet out, the mill will waste energy on lumps. Pre-mix thoroughly and check for visible agglomerates before you start.
Ignoring viscosity. A slurry that looks thin in the tank can thicken as it grinds. Fine particles have more surface area, and more surface area means more liquid demand. Watch the viscosity and adjust solids loading if needed.
Chasing one number. A small average particle size is not a win if the distribution is broad or the slurry is unstable. Look at the full curve, the stability, and the process repeatability.
Poor cleaning. Cross-contamination between trials can ruin your data. Clean the chamber, rotor, and lines thoroughly, especially when switching materials or colors.
A Simple Starting Recipe for Trials
You do not need a secret formula to get started. You need a disciplined approach. Here is a practical sequence for a first trial on a lab horizontal bar pin nano sand mill.
- Pre-mix the slurry. Add the liquid first, then the powder under mixing. Let it wet out. Check for lumps.
- Measure the basics. Record solids loading, viscosity, and starting particle size. A before-and-after comparison is worth more than a vague memory.
- Charge the media. Use the recommended media size and fill level. Record the media type, size, and weight.
- Start with a moderate flow and rotor speed. Do not begin at maximum power. Give yourself room to increase energy if needed.
- Sample at intervals. Take small samples and measure particle size and temperature. Look for changes in viscosity and color.
- Adjust one variable at a time. If you change speed, flow, and media all at once, you will not know what worked.
- Record everything. Rotor speed, flow rate, temperature, number of passes, and particle size results. This log becomes your scale-up map.
If the slurry heats up too quickly, reduce energy input or improve cooling. If the particle size plateaus, check the media size and the pre-dispersion. If the distribution broadens, you may be over-grinding or using too large a media. The mill is talking to you. You just have to listen.
How to Scale Up Without Losing Your Mind
Scale-up is where lab work proves its value. You are not just trying to make a bigger batch. You are trying to reproduce the same grinding environment at a larger scale. That means matching energy density, residence time, tip speed, and media behavior as closely as practical.
Do not simply multiply the batch size by ten and expect the same result. A larger mill has different flow patterns, different heat removal, and different residence time. The lab mill gives you a starting point: media size, solids loading, rotor speed, and pass strategy. From there, you adjust on the pilot or production mill while watching particle size, temperature, and viscosity.
This is also where documentation pays off. If you know that a certain particle size was reached after a specific number of passes at a specific flow rate, you have a target to aim for. If you only remember “it looked good,” you have a story, not a process.
Maintenance and Uptime
A lab mill is a workhorse, but it is not indestructible. The parts that see the most wear are the rotor, the media, the screen or separation gap, and the seals. Keep an eye on them.
Check the media for wear and contamination. Worn media can change the grinding result and may shed debris into your product. Inspect the screen or gap for clogs and damage. Clean the chamber after each campaign, especially if you work with pigments or abrasive materials. Lubricate moving parts according to the manufacturer’s instructions. And do not ignore unusual noise or vibration. A small problem caught early is a cheap problem.
Temperature control deserves a special mention. If the cooling system is not working properly, you may see higher temperatures, higher viscosity, and inconsistent results. Treat the chiller as part of the grinding process, not as an accessory.
FAQ: Straight Answers to Common Questions
Is a nano sand mill the same as a bead mill?
In practice, yes. “Sand mill,” “bead mill,” and “media mill” are often used interchangeably. They all describe a wet grinding machine that uses small media to break down particles. The specific design—horizontal or vertical, disc or bar pin—changes the performance, but the basic idea is the same.
Can it grind dry powder?
No. A sand mill is a wet grinding machine. You need a liquid carrier to make a slurry. The liquid helps disperse the particles, control temperature, and transport the material through the chamber. If you need dry grinding, you should look at a different type of mill.
How long does it take to reach nano size?
It depends on the material, the starting size, the media, the energy input, and the target. Some recipes reach a fine dispersion quickly; others need multiple passes or a longer residence time. Be suspicious of anyone who gives you a single number without asking about your formulation.
Do I always need a chiller?
Not always, but often. Grinding generates heat, and fine grinding generates a lot of it. If your material is temperature-sensitive or your slurry viscosity changes with temperature, active cooling is worth it. A chiller also helps you run longer trials without drifting off recipe.
What media size should I use?
Start with the manufacturer’s recommendation for your target fineness and then test. Smaller media can help with fine grinding, but they may not have enough energy for tough particles. The right choice is a balance between contact points, energy, and separation.
A Practical Next Step
If you are working on a formulation that needs finer particles, better stability, or a more repeatable dispersion, a lab horizontal bar pin nano sand mill is a sensible tool to evaluate. It gives you control, data, and a way to test ideas without committing to a full production line.
Start with a small trial. Pre-disperse well. Choose the media carefully. Record everything. Look at the whole particle size distribution, not just the average. And remember that the machine is only one part of the system—the slurry, the media, and the process all have a say.
When you are ready to look at the hardware, the TENCAN lab horizontal bar pin nano sand mill is a good place to start. Check the technical parameters, confirm the configuration for your application, and ask questions. A friendly supplier should be happy to talk about media, cooling, and scale-up—not just send you a quote.
Grinding is part science, part craft, and part patience. The good news is that a lab mill lets you practice all three without betting the farm. So mix carefully, grind deliberately, and keep good notes. Your future production team will thank you.
Related Products
Get In Touch
Our professional team will reply to you within one business day. Please feel free to contact us!