
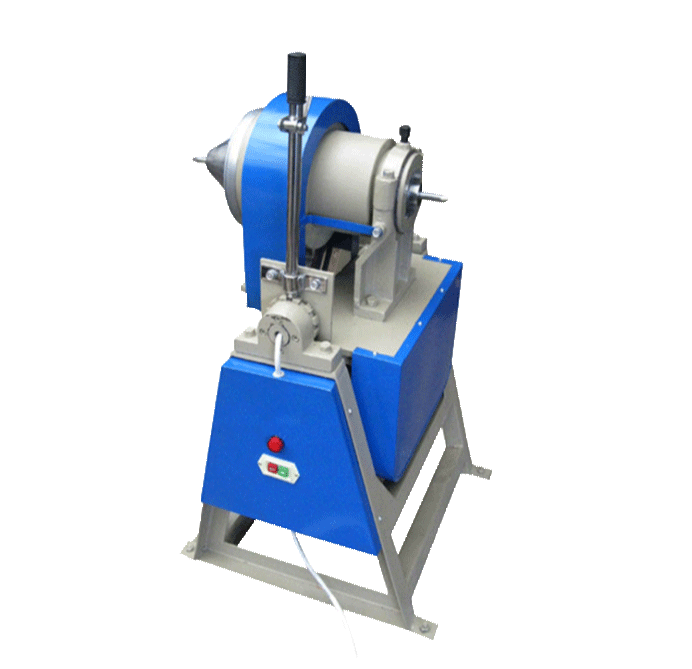
Laboratory Rod Grinder: How It Works, When to Use It, and Smart Buying Tips

If you work in a lab that deals with ores, minerals, ceramics, or any brittle solid, you have probably met the laboratory rod grinder. It is one of those pieces of equipment that looks simple at first glance—a rotating cylinder, a handful of metal rods, a motor—but it quietly solves a very specific problem: turning a coarse sample into a consistent, medium-fine powder without the wild size spread that some other mills leave behind.
In this guide, we will walk through what a laboratory rod grinder actually does, how it differs from a ball mill, where it shines, and what to look for when you are choosing one for your bench. We will also point you to a practical option from TENCAN, a company that specializes in powder technology equipment. No jargon walls, no sales fluff—just the stuff you need to make a smart decision.
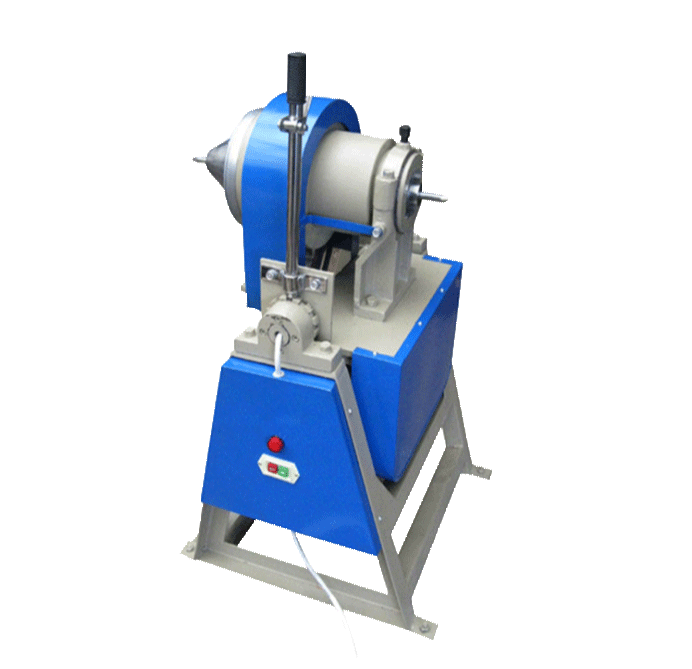
What Is a Laboratory Rod Grinder?
A laboratory rod grinder is a grinding mill that uses long metal rods as the grinding media instead of balls. You load your sample into a cylindrical chamber, add the rods, close the lid, and let the chamber rotate. As it turns, the rods tumble and slide against each other and against the chamber wall. The sample gets caught between those moving rods and is broken down by a mix of impact and attrition.
The “laboratory” part matters. These machines are sized for benchtop or small floor-standing use, not for a full production plant. They handle sample volumes that fit comfortably in a lab workflow—think grams to a few kilograms, depending on the model. That makes them ideal for testing, quality control, research, and small-batch processing.
You will sometimes hear them called rod mills, lab rod mills, or laboratory rod grinding mills. The name changes, but the core idea stays the same: rods, rotation, and a controlled grind.
Rod Mill vs Ball Mill: The Friendly Rivalry
If you have used a ball mill, you already understand the basic rhythm of a tumbling mill. A rod mill works on the same principle, but the media shape changes the grind. Balls are point-contact grinders. They hit the sample at many small spots and can produce a fine powder with a relatively wide particle size distribution. Rods, on the other hand, create line contact. The grinding action is more like a series of long, rolling pinches. That tends to produce a narrower size distribution and fewer extreme fines.
In practice, this means a rod grinder is often the better choice when you want a consistent medium-fine product and you do not want to over-grind the sample into dust. It is also a great option for materials that are prone to packing or coating in a ball mill, because the rod charge leaves more open space and the grinding bed is less tightly packed.
Why Rods, Not Balls?
The secret is in the contact pattern. When rods tumble, they can arrange themselves parallel to each other. The sample grains are trapped between two rod surfaces and are crushed along a line. This line-contact crushing is efficient for particles that are already somewhat reduced in size. It also means the energy is spread over a larger area, so you get less localized overheating and less shock loading on the mill.
Another advantage is that rods are heavy. A single rod can weigh more than a handful of small balls, so the tumbling mass carries a lot of momentum. That momentum helps break down tougher samples without requiring extremely high rotational speeds. For lab work, this can translate into shorter grinding times and simpler operation.
How a Laboratory Rod Grinder Works
Let us open the lid—metaphorically—and follow the sample through the process.
Step-by-Step Inside the Grinding Chamber
First, you prepare the feed. The sample should be crushed or pre-sized to fit the mill’s recommended feed size. If you throw in a chunk that is too large, the rods will spend their energy bouncing it around instead of grinding it. Most lab rod grinders work best with feed that is already below a few millimeters, but the exact limit depends on the chamber size and rod diameter.
Second, you load the rods. The number and size of rods matter. Too few rods, and you lose grinding efficiency. Too many, and the charge cannot tumble properly. The right load gives you a cascading motion where rods lift, tumble, and slide. You will usually fill the chamber to a certain percentage of its volume—often around 30 to 50 percent—but the manufacturer’s guidance should be your starting point.
Third, you add the sample. A good rule of thumb is to keep the sample volume small enough that the rods can move freely. If the chamber is packed with powder, the rods will just rotate together like a solid mass, and grinding will stall.
Fourth, you close the chamber and set the rotation speed. The mill turns, the rods tumble, and the sample is reduced by impact, attrition, and abrasion. Depending on the material and the target fineness, the grind might take a few minutes or closer to an hour.
Finally, you discharge the powder. Many lab rod grinders make this step easy with a removable chamber or a discharge port. You separate the ground sample from the rods, clean everything, and you are ready for the next batch.
The Role of Rotation Speed and Grinding Media
Speed is a balancing act. If the mill spins too slowly, the rods just slide along the bottom and do little work. If it spins too fast, the rods get pinned to the chamber wall by centrifugal force and stop tumbling. The sweet spot is a speed where the rods lift and then cascade back down, creating that characteristic grinding action.
Rod diameter is another lever. Thicker rods are heavier and can break larger particles, but they also create larger voids. Thinner rods give more contact points and can produce a finer grind, but they may bend or wear faster. Many labs keep a few rod sets on hand and switch them based on the sample.
Material compatibility matters, too. You do not want to contaminate your sample with iron from the rods. If you are grinding a soft or sensitive material, you might choose stainless steel, ceramic, or another wear-resistant rod material. For routine mineral samples, standard steel rods are often fine.
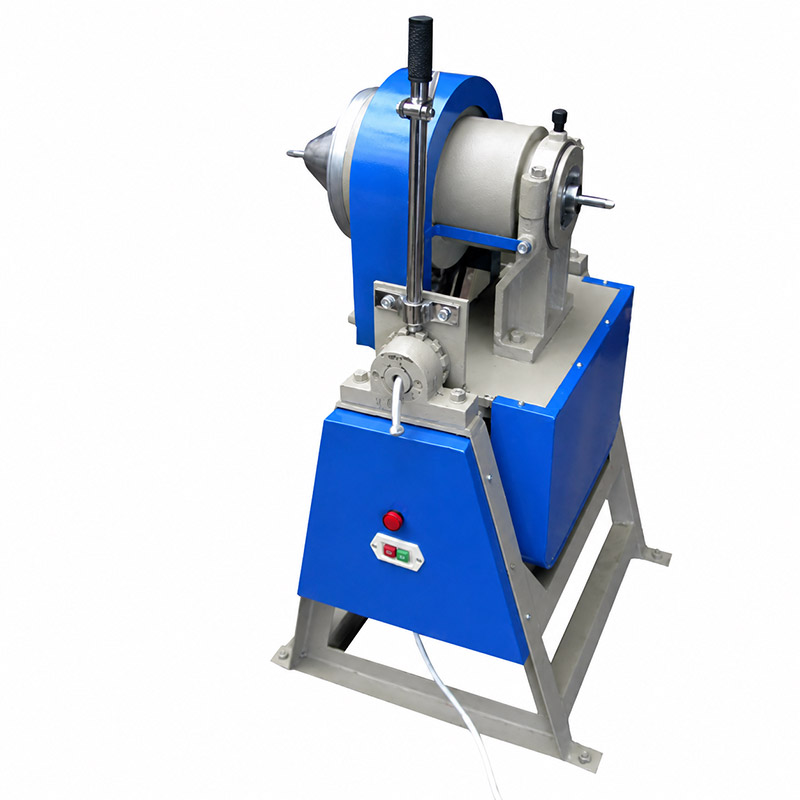
What the Laboratory Rod Grinder Is Good At
Rod grinders are not universal mills. They have a personality, and they do their best work in certain situations. Here is where they tend to shine.
Coarse-to-Medium Grinding with a Tighter Size Distribution
If your target is a powder that is mostly in the medium-fine range—say, below a few hundred microns—a rod grinder can deliver a pleasantly uniform product. The line-contact action avoids the “dust and boulders” problem that can happen in a ball mill, where some particles get pounded into fines while others barely get touched. That tighter distribution is a big deal for downstream analysis, because a representative sample is easier to split and test.
Sample Prep for Ores, Minerals, Ceramics, and More
Laboratories that handle geological samples, cement clinker, ceramics, glass, slag, and similar brittle materials often keep a rod grinder on the bench. It is also useful for preparing samples for XRF, XRD, and other analytical methods where you need a consistent particle size. Because the rods create a relatively gentle grinding environment, heat-sensitive materials are less likely to degrade compared to some high-energy mills.
Rod grinders can also handle wet grinding in some configurations, which helps control dust and can improve grinding efficiency for certain slurries. But not every lab model is designed for wet operation, so check the specifications before you fill the chamber with liquid.
When a Rod Grinder Is the Wrong Tool
Let us be honest: a rod grinder is not the best choice for every job. If you need ultra-fine grinding down to a few microns, a planetary ball mill or a high-energy attritor will usually get you there faster. If your sample is fibrous, elastic, or very soft, rods may just smear it instead of breaking it. And if you need continuous, high-throughput production, a lab-scale rod grinder will feel like a bottleneck.
The key is to match the mill to the material and the target size. Rod grinders are specialists, not generalists—and that is exactly why they are so good at what they do.
Rod Grinder vs Other Lab Mills
It helps to see how a rod grinder stacks up against the other mills you might already know. Here is a quick comparison, based on typical lab behavior rather than hard-and-fast rules.
| Mill type | Grinding media | Typical grind | Size distribution | Best fit |
|---|---|---|---|---|
| Laboratory rod grinder | Long rods | Medium | Narrow | Uniform coarse-to-medium prep |
| Ball mill | Spheres | Medium to fine | Moderate | General lab grinding |
| Planetary ball mill | Small spheres | Fine to ultra-fine | Broad | Nano and fine research |
| Vibratory mill | Cylinders or balls | Fine | Moderate to broad | Fast small batches |
Use this table as a starting point, not a verdict. Your sample’s hardness, brittleness, and moisture content can shift the results. The rod grinder’s real edge is its ability to produce a consistent medium grind without creating a huge pile of unwanted fines.
Choosing the Right Laboratory Rod Grinder
Once you know a rod grinder fits your workflow, the next step is picking the right one. Here are the features that matter most.
Capacity and Chamber Size
Start with batch size. How much sample do you typically grind at once? A small benchtop model might handle 100 grams to 1 kilogram, while a larger lab model can take several kilograms. Do not just pick the biggest chamber you can afford. A large chamber with a tiny sample load will not grind efficiently because the rods will not have enough material to work against. A smaller chamber that matches your typical batch will give you better results and less wasted energy.
Rod Material and Wear
Ask what the rods are made of and how easy they are to replace. Common options include high-carbon steel, stainless steel, and ceramic materials. The right choice depends on your sample’s hardness and your contamination tolerance. If you are grinding abrasive minerals, expect the rods to wear over time. A mill that lets you swap rods quickly will save you a lot of downtime.
Motor, Speed Control, and Safety
A reliable motor with adjustable speed gives you flexibility across different materials. Variable frequency drives (VFDs) are common on modern lab mills and let you fine-tune the rotation speed without changing pulleys or gears. Safety features are just as important: a locked lid, an emergency stop, and guards that keep hands away from moving parts. Grinding mills are powerful machines, and a little respect goes a long way.
Easy Cleaning and Sample Recovery
Cross-contamination is the enemy of good lab work. Look for a design that opens easily, has smooth interior surfaces, and allows you to remove the rods and powder without wrestling with hidden crevices. A mill that is easy to clean is a mill you will actually use. Also check how the powder is discharged. Some models tilt to pour, while others have a removable chamber or a discharge door. The best design is the one that fits your daily routine.
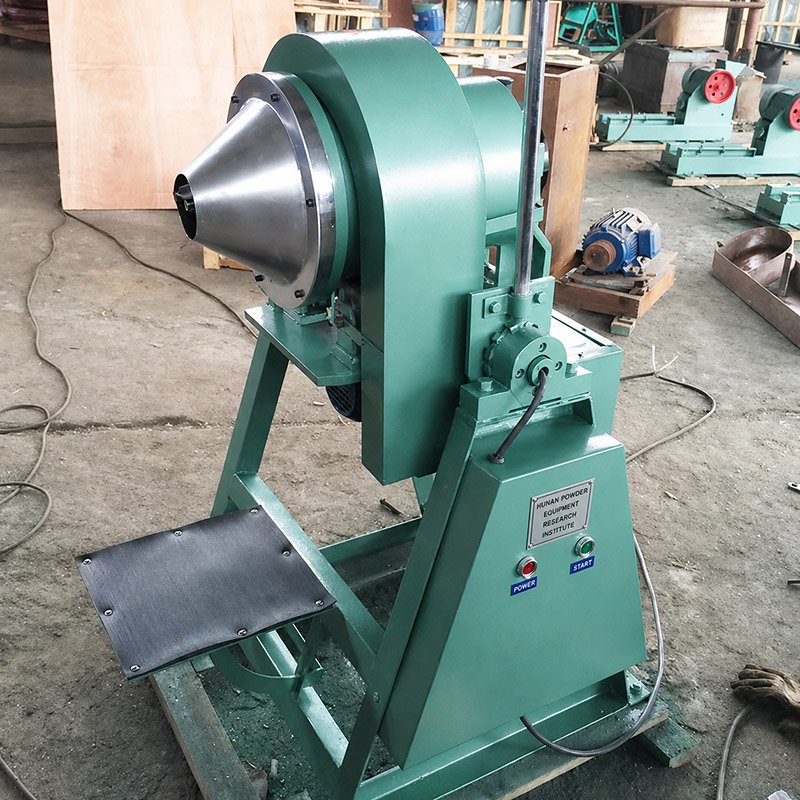
TENCAN Laboratory Rod Grinder: A Practical Option for Lab Teams
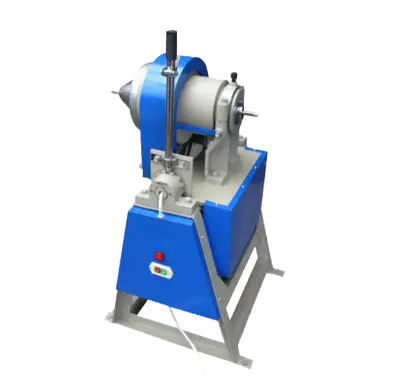
If you are looking for a laboratory rod grinder that is built for real lab work, TENCAN offers a model worth a closer look. The TENCAN laboratory rod grinder is designed for sample preparation and small-batch grinding, with a sturdy construction that fits comfortably in a materials lab, geology lab, or quality control room.
You can see the full details, including images and specifications, on the product page: Laboratory Rod Grinder. The page gives you a clear view of the machine’s layout, so you can judge whether it matches your bench space and workflow. If you are comparing options, this is a good reference point for what a modern lab rod grinder should offer.
TENCAN focuses on powder technology equipment, so the rod grinder is part of a broader family of mills and grinding tools. That can be helpful if you need to scale up, test different grinding media, or add complementary equipment later. You can also visit the same product page for more information: TENCAN laboratory rod grinder.
Operating Tips for Better Rod Milling Results
You can have the best mill in the world and still get mediocre results if you ignore the basics. These tips will help you get the most from your laboratory rod grinder.
Feed Size and Moisture
Keep your feed consistent. A mix of large and small particles forces the rods to do two jobs at once, and the large ones always win. Pre-crush your sample to a uniform size before loading. Moisture is another silent troublemaker. Damp powder can stick to the rods and chamber walls, forming a cake that slows grinding and makes cleaning a chore. If your sample is hygroscopic or wet, consider drying it first or using a wet grinding setup if the mill supports it.
Load, Speed, and Time
Resist the urge to fill the chamber to the top. The rods need room to tumble. A charge that is too full will just spin as a solid mass. Start with the manufacturer’s recommended load and adjust in small steps. Speed should be high enough to cascade the rods but not so high that they centrifuge. Grinding time is a trade-off: longer grinding gives you a finer product, but it also increases wear and can broaden the size distribution if you overdo it. Run a few trial batches and check the particle size so you can dial in a repeatable recipe.
Prevent Overgrinding
Overgrinding is the enemy of reproducibility. When you grind too long, the finest particles cushion the rods, reduce impact efficiency, and generate heat. You also create more fines, which can change the behavior of your sample in downstream tests. If your target is a medium grind, stop when you hit the size window. A quick sieve check or laser diffraction measurement can tell you when to stop.
Maintenance Habits
Clean the chamber and rods after every batch. Inspect the rods for bends, cracks, or heavy wear. Replace worn rods as a set so the grinding action stays balanced. Lubricate moving parts according to the manual, and check belts, bolts, and safety interlocks regularly. A little preventive maintenance now will save you from a mid-experiment breakdown later.
Common Mistakes to Avoid
Even experienced lab teams can fall into a few traps with rod milling. Here are the ones we see most often.
Overloading the Chamber
It is tempting to add more sample to get a bigger batch done in one go. But overloading kills the tumbling action. The rods cannot lift and cascade if they are buried in powder. Keep the load within the recommended range, and if you need more throughput, run multiple batches instead.
Using Worn or Bent Rods
Rods do not last forever. Bent rods create uneven contact, which leads to inconsistent grinding and unnecessary stress on the mill. Cracked rods can break and damage the chamber. Inspect them often and replace them as a set when you see wear.
Skipping Pre-Crushing
A rod grinder is not a primary crusher. It works best when the feed is already reduced to a manageable size. If you skip pre-crushing, you will spend more time and energy for a poorer result. A jaw crusher or a simple mortar and pestle can save your rod mill a lot of grief.
Grinding Wet Without Checking
Wet grinding can be a great option for dust control and slurry processing, but not every rod grinder is built for it. Using liquid in a mill that is not sealed for wet operation can cause leaks, corrosion, and motor damage. Always check the manual first.
Ignoring Contamination
If you are analyzing trace elements, the last thing you want is iron or chromium rubbing off into your sample. Match your rod material to your analytical needs. When in doubt, run a blank and check for contamination before you trust your results.
Safety and Noise: Practical Considerations
A lab mill is a powerful rotating machine, so safety deserves more than a passing thought. Here is what to keep in mind.
Personal Protective Equipment
Wear safety glasses, a lab coat, and hearing protection when the mill is running. Dust masks are a good idea when you load or discharge dry powder. Gloves can protect your hands, but be careful around rotating parts—never wear loose gloves or jewelry near an open mill.
Dust Control
Fine powders can become airborne during loading and unloading. Work in a ventilated area or a fume hood if your sample is hazardous. Keep the area clean and avoid dry sweeping, which just puts dust back into the air. A wet wipe or a HEPA vacuum is a better choice.
Noise and Vibration
Tumbling mills are not quiet. Rods hitting the chamber wall create a steady rumble that can exceed comfortable levels over a long shift. Place the mill on a sturdy bench or floor mount, use vibration dampers if needed, and give it space so it does not rattle against nearby equipment.
Electrical Safety
Keep liquids away from the motor and control panel. Check that the power cord and plug are in good condition, and do not run the mill with the safety interlock bypassed. If the mill starts to smell hot or make unusual noises, stop it and investigate before restarting.
FAQ About Laboratory Rod Grinders
Can a rod grinder replace a ball mill?
Not entirely. They overlap, but each has a sweet spot. A rod grinder is excellent for medium grinding with a narrow size distribution. A ball mill is more versatile for fine and ultra-fine grinding. Many labs keep both.
How long does a typical grind take?
It depends on the material, feed size, target fineness, and mill settings. Some samples reach the target in a few minutes, while tougher ones may need 30 to 60 minutes. Trial runs are the best way to find your recipe.
Is wet grinding possible?
Some laboratory rod grinders support wet grinding, but not all. Check the product specifications. Wet grinding can reduce dust and improve efficiency for certain materials, but it also requires more cleaning and a different discharge setup.
What rod material should I choose?
Match the rod material to your sample. Stainless steel is a good general-purpose choice for many minerals. Ceramic rods are better when iron contamination is a concern. For very abrasive samples, hardened steel may last longer.
How do I know if the grind is finished?
Do not rely on time alone. Take a small sample and check the particle size with a sieve, microscope, or particle size analyzer. Once you are in your target window, stop the mill. Consistency comes from measuring, not guessing.
Putting It to Work in Your Lab
A laboratory rod grinder is a focused tool for a focused job. It gives you a controlled, medium-fine grind with a tighter particle size distribution than many other lab mills, and it does so with a simple, robust design that is easy to operate and maintain. If your work involves brittle minerals, ceramics, or similar materials, and you care about reproducible sample preparation, a rod grinder deserves a spot on your shortlist.
When you are ready to compare models, start with the TENCAN laboratory rod grinder on the product page. Look at the chamber size, rod options, motor control, and cleaning access. Then ask yourself: does this fit my batch size, my materials, and my daily workflow? If the answer is yes, you have found a reliable partner for your lab’s grinding tasks.
And if you are still unsure, remember that the best mill is the one that matches your sample, not the one with the biggest motor. A rod grinder is a specialist, and when you use it for the right job, it can make your sample prep faster, cleaner, and far more consistent.
Related Products
Get In Touch
Our professional team will reply to you within one business day. Please feel free to contact us!