
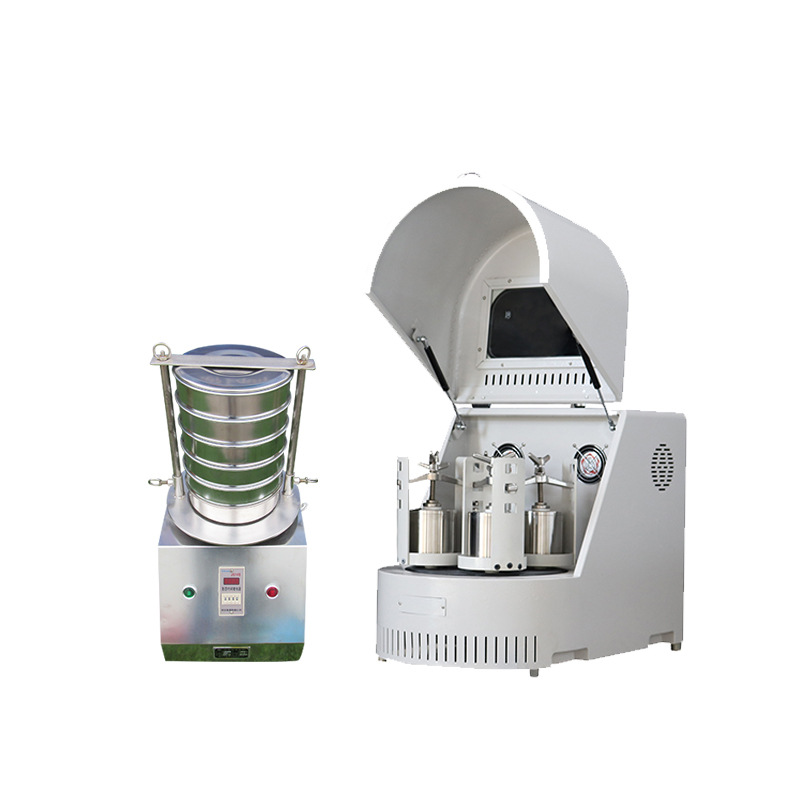
Soil Grinder and Sieve Machine: A Practical Guide for Faster, Cleaner Soil Prep

You can learn a lot about a lab by the way it prepares soil. A beautiful instrument is no help if the sample in front of it is a handful of clods, roots, and stones. That is where a soil grinder and sieve machine earns its place. It turns raw field soil into a consistent, method-ready sample, so the numbers you report later actually mean something.
We are going to walk through what this equipment does, why sample prep is more important than it looks, and how to choose a setup that fits your work. You can open the soil grinder and sieve machine product page for the current build information while you read.
What a soil grinder and sieve machine actually does
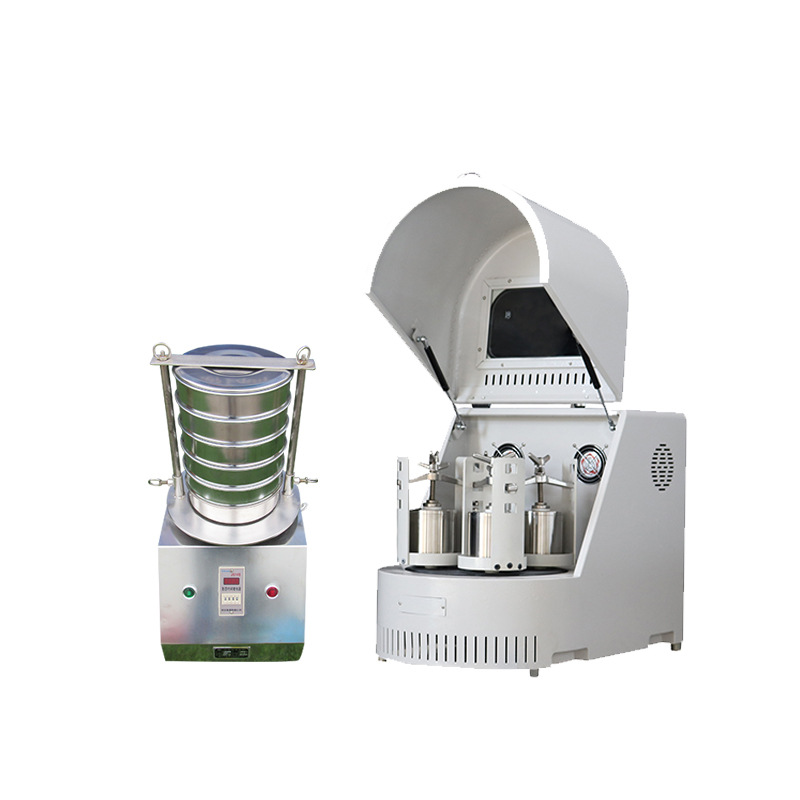
A soil grinder and sieve machine brings two jobs into one workflow: reducing soil aggregates and particles to a workable size, and separating the result into a controlled fraction. The grinder breaks down clods and larger pieces. The sieve then decides what stays in the sample and what is removed or held back. That sounds simple, and in principle it is. In practice, those two steps decide whether your sample is representative or just convenient.
Good preparation is not about making soil look uniform. It is about making a small scoop behave like the field it came from. If the coarse fragments, roots, and fine material are not handled consistently, two analysts can follow the same method and still get different results. The machine helps you remove that variability.
Grinding is not crushing for its own sake
When we say grinding, we mean controlled size reduction. You want to break up aggregates without overworking the sample or heating it unnecessarily. Overgrinding can change the material you are trying to measure, especially when the sample contains organic matter or sensitive minerals. The aim is a repeatable working condition, not the finest powder possible. That distinction matters when you compare results across batches or across labs.
Sieving is the quality gate
The sieve is where the method becomes visible. A defined opening gives you a defined fraction, and that fraction should be the one your procedure asks for. If the sieve is overloaded, damaged, or simply the wrong size, the sample may look fine but fail the method. Treat sieving as a quality gate, not a cleanup step. It is the point where you confirm that the material going forward is the material you intended to test.
Why soil sample preparation deserves more respect
Sample prep has a reputation problem. It sits between field collection and the exciting analytical work, so it often gets rushed. But the errors created here are hard to undo later. A sample that was not dried consistently, not mixed properly, or not sieved to the right fraction can produce precise-looking data that is quietly wrong.
Think of preparation as the first measurement. Every choice you make—how you dry, how you split, how you grind, how you sieve—shapes the sample that reaches the instrument. A soil grinder and sieve machine does not make those choices for you. It gives you a controlled way to carry them out.
Where poor prep shows up later
Poor preparation rarely announces itself with an error message. It shows up as scatter between replicates, unexpected values in one batch, or a nagging feeling that the result does not match the field notes. Sometimes the problem is contamination from a worn part. Sometimes it is a sample that was still damp when it was ground. Sometimes it is simply an inconsistent sieve fraction. By the time you see it in the data, the sample may be gone.
Representative samples beat pretty samples
A pretty sample is uniform, free-flowing, and easy to handle. A representative sample is the one that still contains the right proportions of what was in the field. Those two goals are not always the same. Your preparation workflow should preserve representativeness first. If the method requires removal of coarse fragments or roots, remove them consistently and record what you removed. Do not let convenience quietly change the sample.
Inside a typical soil grinder and sieve workflow
Exact steps depend on your procedure and the condition of the soil, but a careful workflow usually follows a similar rhythm. The details change; the logic does not.
Step 1: Receive and document the sample
Start with identification. Record the sample ID, field location, depth, collection date, and any visible condition such as moisture, roots, or stones. If a sample arrives wet, note it. If it arrives in a bag that has been sitting in a warm room, note that too. Documentation is not paperwork for its own sake; it is the context that makes later numbers interpretable.
Step 2: Dry to a workable condition
Many soil workflows call for air-drying before grinding, because damp soil clogs equipment and smears rather than breaks. The key word is consistent. A sample that is bone dry and one that is still slightly damp will behave differently in the grinder. Follow your method and aim for a uniform condition across the batch. If the method specifies a drying temperature or time, treat that as part of the measurement, not a suggestion.
Step 3: Grind to a consistent size
Feed the sample at a rate the machine can handle. Overloading a grinder is like overloading a sieve: the result looks finished, but the work is uneven. Let the equipment do the reduction at a steady pace, and check the output for unbroken clods or material that has passed through too quickly. If your machine has adjustable settings, change one thing at a time and keep notes so you can repeat the setup.
Step 4: Sieve and keep the right fraction
Once the soil is reduced, the sieve separates the fraction your method calls for. Do not force material through by hand if the method does not allow it. Do not tap or shake a sieve so hard that you damage the mesh. And do not ignore the material that stays on top. That retained fraction is information. It may need to be weighed, recorded, or processed separately depending on your procedure.
Step 5: Clean and cross-check
Cleaning between samples is one of the least glamorous parts of sample prep, and one of the most important. A brush, a vacuum, or a quick dry wipe may be enough for one sample, while another may need a more thorough changeover. Use the cleaning routine that prevents carryover without adding contamination of its own. Then cross-check: does the prepared sample match the method, the label, and the field notes? If not, stop and fix it before the sample moves on.
What to check before you choose a machine
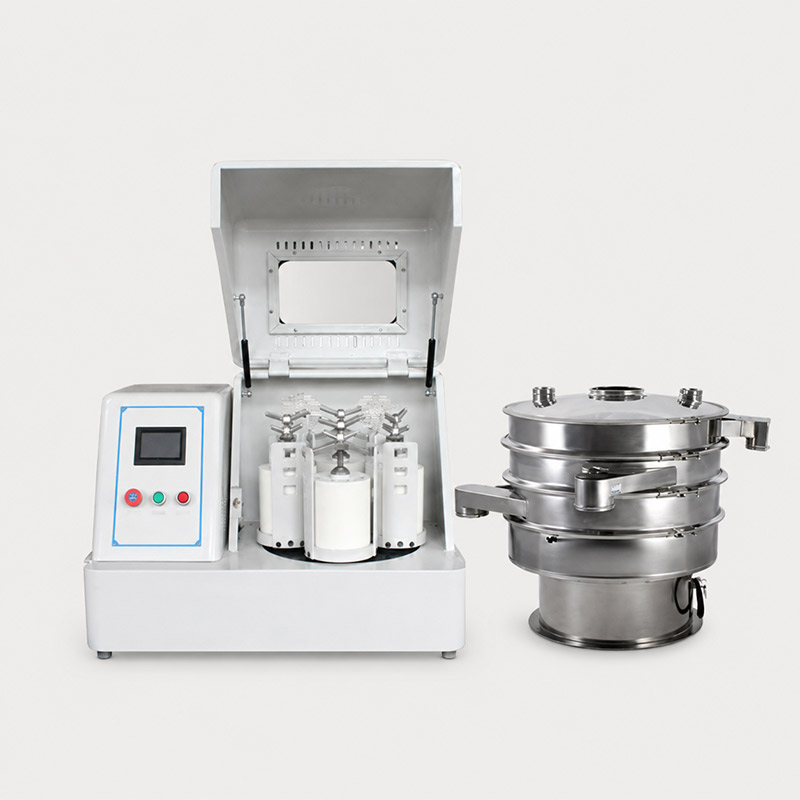
The product page is the right place to confirm current options, because a soil grinder and sieve machine can be configured around different sample sizes and methods. You can review the soil grinder and sieve machine details for the build-specific technical parameters, including the information you need to match the unit to your lab. Do not assume a number from a photo or a general description. Confirm it for the configuration you are buying.
Sample size and throughput
Be honest about your real workload. A machine that is comfortably sized for occasional samples can become a bottleneck in a busy lab, while an oversized unit can be awkward to clean and harder to fit into a tight workflow. Think in terms of typical batch size, peak season, and how often you change samples. The right capacity is the one that lets you work consistently without turning preparation into an endurance test.
Target particle size and sieve choice
The sieve is not an accessory; it is part of the method. Confirm that the available sieve options match the fraction your procedure requires, and that changing sieves is practical for the way you work. If you handle several methods, think about how you will organize and verify different sieves so that the wrong one does not slip into a batch. Labeling and a simple check routine solve more problems than memory.
Material contact and contamination
Soil is abrasive, and abrasive samples wear equipment. Ask what the sample contacts and how those surfaces behave over time. A worn surface can contribute material to the sample, and that is the last thing you want in a trace-level workflow. The right choice depends on your analytes and your method, so make contamination control a conversation, not an afterthought.
Cleaning and changeover
Look at the machine the way you will actually use it: with a brush in one hand and a sample bag in the other. Are the grinding areas accessible? Can the sieve be removed and checked without a struggle? Is there a place where soil will hide? A design that is easy to clean encourages good habits. A design that is difficult to clean encourages shortcuts.
Dust, noise, and lab fit
Dry soil preparation can create dust, and dust is both a housekeeping issue and a health issue. Think about where the machine will sit, how you will control dust, and whether the sound level fits the room. A dedicated prep area with good ventilation and a clear cleaning routine is worth more than a long list of features that do not address the daily reality of soil work.
Documentation and repeatability
Repeatability deserves a quick check too. Can you record the settings, sieve used, and preparation steps in a way that another person can follow? The best machine in the world cannot fix a process that lives only in one person's memory. A simple log sheet and a consistent workflow turn a good tool into a reliable method.
A simple prep routine you can actually keep
Sample prep works best when it is boring. Not careless, but predictable. A short routine that everyone follows beats a perfect plan that only one person remembers. Build the routine around the machine, then let the machine fit into it.
You do not need a complicated quality system to make this work. A one-page method note, a clean bench, and a habit of checking the sieve before every batch will do more for your data than an expensive upgrade. The goal is repeatability you can see, not perfection you can only talk about.
Before the sample arrives
Check that the grinder and sieve are clean, dry, and set up for the method you are about to run. Confirm the sieve you need is the sieve you have. Put a log sheet within reach and make sure the sample bags, brushes, and cleaning supplies are where they belong. Ten minutes of setup can save an hour of second-guessing later.
During preparation
Work at a pace that lets you observe the sample. Watch for damp pockets, roots, stones, or anything that behaves differently from the rest of the batch. Record what you see, not just what you do. If something needs to be removed, remove it consistently and note it. If the machine starts to struggle, stop and check the feed rate rather than forcing the sample through.
After the sample leaves the machine
Label the prepared sample immediately. Clean the equipment before the next sample gets anywhere near it. Give the sieve a quick inspection for damage or blocked openings. Then close the loop: compare the prepared sample with the method and the field notes. A two-minute check at the end is much cheaper than repeating an analysis later.
Common mistakes that quietly ruin soil data
- Grinding while the sample is too wet. Damp soil can smear, clog, and behave unevenly. Dry to a consistent condition first.
- Overloading the sieve. Too much material at once reduces separation efficiency and makes the fraction less reliable.
- Skipping the retained fraction. What stays on the sieve is part of the sample story. Record it or process it as your method requires.
- Cleaning only the obvious surfaces. Hidden soil can carry over between samples and contaminate the next batch.
- Changing several settings at once. If something goes wrong, you will not know which change caused it. Adjust one variable at a time.
- Treating preparation as unskilled work. The person running the grinder and sieve is making measurement decisions, not just moving soil from one container to another.
How to choose the right setup for your lab
The right soil grinder and sieve machine is the one that fits your method, your workload, and your cleaning routine. That sounds obvious, but it is easy to get distracted by a long feature list and forget the daily job. Start with the sample. Then work outward.
Start with your method, not the brochure
Write down the sample mass you normally prepare, the target fraction, the drying condition, and the cleaning requirement. Those four details will narrow the field faster than any marketing claim. If a supplier cannot explain how the machine fits that routine, keep asking questions. A good product conversation should sound like a working method, not a sales pitch.
Match capacity to real workload
Capacity is not just about how much the machine can hold. It is about how much you can prepare in a day without rushing, skipping cleaning, or cutting corners. A slightly larger unit that saves changeover time may be better than a smaller unit that forces you to run batch after batch. On the other hand, a very large unit can be overkill if most of your samples are small. Choose for the work you actually do.
Think about the whole chain
The grinder and sieve do not work alone. They sit between drying, splitting, weighing, and analysis. If the sample is not dried consistently or split representatively, the best sieve in the lab will not rescue it. Build a workflow that connects each step, and make it easy for the next person to see what happened. That is how you get data you can trust, not just data you can file.
FAQ
Is a soil grinder and sieve machine only for agriculture?
No. Soil preparation shows up in environmental work, geotechnical studies, land reclamation, ecology, and education. The common thread is the need for a representative, method-ready soil sample. The same basic logic applies whether you are studying nutrients, contaminants, texture, or something else.
Can one machine handle both fine and coarse preparation?
It depends on the configuration and the sieve options you choose. The practical answer is to confirm the available setups against your methods before you buy. If you regularly switch between very different fractions, make changeover and sieve organization part of your decision.
How do I know the right sieve size?
Your method should define it. If the method gives you a choice, choose the one that matches the question you are asking and stay consistent across the study. The sieve size is part of the measurement, so changing it mid-project can create a data break that is hard to explain later.
What should I ask before buying?
Ask about sample contact materials, cleaning access, sieve options, realistic throughput, dust control, and what information is supplied with the unit. Then ask for the technical parameters in writing for the exact configuration you are considering. A clear answer today saves a lot of guessing tomorrow.
Soil preparation will never be the most glamorous part of the lab, but it is one of the most honest. A good soil grinder and sieve machine helps you do the same careful job again and again, so the interesting part—the analysis—starts from a sample that deserves to be trusted.
Related Products
Get In Touch
Our professional team will reply to you within one business day. Please feel free to contact us!